Robe a la Revamp

The robe a l’Anglaise strikes again.  One of my housemates loves costume parties, and decided to have a 1980s movie themed birthday party.  I was feeling lazy and didn’t want to make a whole new costume, so I decided it was a good opportunity to fix up the robe a l’Anglaise (shh.  Amadeus was made in the 1980s.  Terrible, terrible costumes.  But shh.  This totally counts).  I was never really happy with the skirt the first time, and it needed a bit of trim, which I’d mostly done earlier, but needed an excuse to finish.

2014-07-16 15.51.50

The trim was just strips cut out with pinking shears and then pleated prickstitched to the sleeves and neckline.  I only had one cuff left to do, so that was easy.  It was pretty crumpled from being in the bottom of the sewing chest for so long though, so I steamed it as well, using a pair of chopsticks to zhoosh it out while I was steaming.  Don’t hurt yourself with steam, kids.

I was kind of dreading re-doing the skirt in a faint pit-of-the-stomach, this-should-be-easy-but-god-I-hate-it way that’s normally reserved for filing my tax return.  The original problems were that it wasn’t long enough at the back, and the pleating was meh.

DSC_0178

You can see a good 6 inches of petticoat at the back in that picture.

Weirdly enough, the solution wasn’t that hard.  The skirt had been made of two rectangles sewn together selvage to selvage originally, but I HAD left them longer at the back… I’d just been a dill and sewn the wrong selvages together.  The short ones.  The ones that were meant to go at the front edges. So I took it off the bodice, unpicked the CB seam and re-did it on the right edges.  Problem solved.

I then decided that seeing I’d been such a grownup and done my tax properly the last couple of years, how hard could re-attaching the skirt properly be?  I just needed to approach it with a strategy for a change.

The strategy, for all ye who struggle attaching skirts to quarterback-style Anglaises is that I measured how far around the bodice I wanted it to go, then measured that length on the ironing board, putting pins at the ends and at the half and quarter-way marks.  Then I divided the skirt in halves and quarters and pinned it to the ironing board where the marker pins were.  Then I knife-pleated it until it fit and basted the pleats in place.  Then I just backstitched it to the bottom edge of the bodice.  The back point isn’t as pointy as last time, but the whole thing just sits better.

Finished product:

13054844_10153538275895592_330106693_o

Who’s your favourite 18th century babe?

Also, behold my mad hedgehog skillz!  It partially works because my hair is very layered at the moment, but also because period curling techniques work really really well.  And all you need is some tissue paper and a hair straightener.  I didn’t even use curling product this time and it still worked.  Then brush it out with a bristle brush, tease the crapola out of all of it except the long curls at the bottom, hairspray till you can’t breathe, and boom, you have a hedgehog.

I don’t think I’ll be wearing this dress again though, unless I let it out a bit.  I’ve gained some muscle in my new job.  Not much, but enough that I should be wearing the stays looser, but the l’Anglaise doesn’t close unless they’re done up all the way.  So it wasn’t very comfy, and on top of the fact that I was super tired already and loathe late nights, I spent half the party napping on a chair in the corner.

13090641_10153538213405592_2094953209_o

Who’s the life of the party?  Not me.

Wigging Out


Allow me to start by apologising for the postage drought, I was moving house.  I’ve got such a backlog to blog about though.  I’ll start with the exciting thing, so loo breaks now guys, this is a long one.

My Satsuki cosplay wig arrived in the mail! I was pretty concerned when I was vacillating between options on Aliexpress, not sure which shops were treasure troves of soft, silky, Pantene ad hairflick-worthiness and which were quagmires of manky plastic head-tumbleweeds, but fortunately the gamble paid off and the one I picked belonged to the former category. They all appear to use the same stock photos. It truly is a gamble.

I will now reveal the way that I was taught to put on a wig properly at my very first professional operatic engagement. I presume most cosplayers do it similarly.

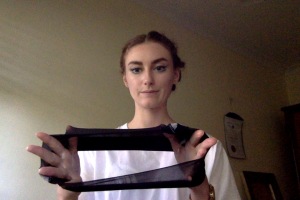
You’ll need bobby pins, those wide V-shaped pins, and a stocking cap (basically get a pair of stockings you don’t like and cut the legs off.). Though a hair net would probably do, a stocking cap is better because, unlike hairnets, stockings spend a lot of their time holding people’s stomachs in for them so they can definitely handle holding your hair flat to your head and securely out of the way for a three hour opera (or a convention).

Photo on 17-01-2016 at 6.19 PM #2

My hair and its mortal enemy prepare to face off in an epic battle…

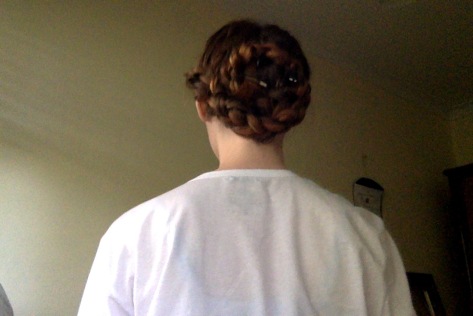
So first you’re going to flatten your hair out of the way. My hair has grown a lot since 2013 and I’m light on bobby pins right now, so instead of dividing it into sections and pin curling it flat like I was taught, I braided it into pigtails and pinned them flat in loops at the back of my head. Like a pretzel.  Or Princess Leia on a lazy day.

Photo on 17-01-2016 at 6.19 PM #3Photo on 17-01-2016 at 6.21 PMPhoto on 17-01-2016 at 6.25 PM

If you have the pins, do pin curls though.  Seriously.  It’ll look better than this.

Next you’ll get your stocking cap and put it around your neck. drag it up around your hairline, making sure you tuck in all the fly-aways.

Photo on 17-01-2016 at 6.25 PM #2Photo on 17-01-2016 at 6.26 PMPhoto on 17-01-2016 at 6.26 PM #2Photo on 17-01-2016 at 6.26 PM #3

Then you’ll fold the ends of the cap in nice and tight and pin them in place with those wide pins.

Photo on 17-01-2016 at 6.28 PM

TRIUMPH!

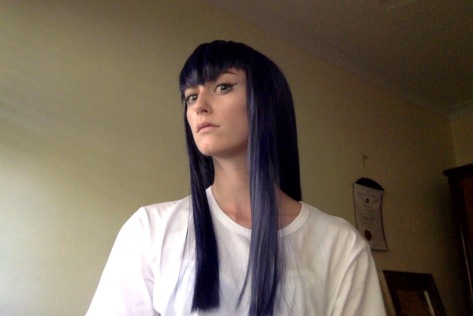
Now get your wig and carefully pop it on over the top. Zhoozh it out a bit and then if it’s a heavy wig you can even use more of those wide pins to secure it in place under the top layers of hair. Pin through the stocking cap and into the pin curls/braids and that thing will not move.

Photo on 17-01-2016 at 6.33 PM #2

Seeing this is the first time I’ve cut a wig, I looked up a heap of tutorials.  It appeared to be a 50-50 between people who prefer to cut while the wig is on a styrofoam head and people who prefer to wear the wig while they cut.  I chose the latter, as I figured it’d be easier to get the length and shape right around my own face, and with the stocking cap on firmly it’d be pretty hard to accidentally cut my own hair.  The downside to doing it this way is that occasionally you will flick little ends of cut hair into your eyes, which is a billion times worse than getting real hair in your eye.

Most of the tutorials advocated holding the scissors vertically, which I did for all but one step (getting rid of super excess length).  One of them also suggested that for doing the fringe it helped to split it in half and do half a at a time.  Given this was what the fringe looked like beforehand, I heartily endorse this strategy:

DSC_1635

Cousin It Senpai

So I popped a plastic bag in the sink, split the fringe in half and cut away the bulk of that side to just below eye level with the scissors horizontal.  Then I turned the scissors vertically and started to neaten it up a bit, curving it up towards the temple.  Satsuki’s fringe is longer in the middle and curves up at the sides.  I clipped the rest of the hair back to avoid accidentally getting any.

DSC_1637

Once one side was done, I did the other to match, using a bit of hairspray to keep everything in place.  Then I separated out the two shorter locks which come over her shoulders and cut them off at chest height.  I’ll go back in there once more to round off the pointiness of the front, but it’s pretty much done.

DSC_1640

I’m super pleased with the colour though, and with how long and silky it is. But the sink looked like I’d shaved Cookie Monster in it.

DSC_1642

For shame.

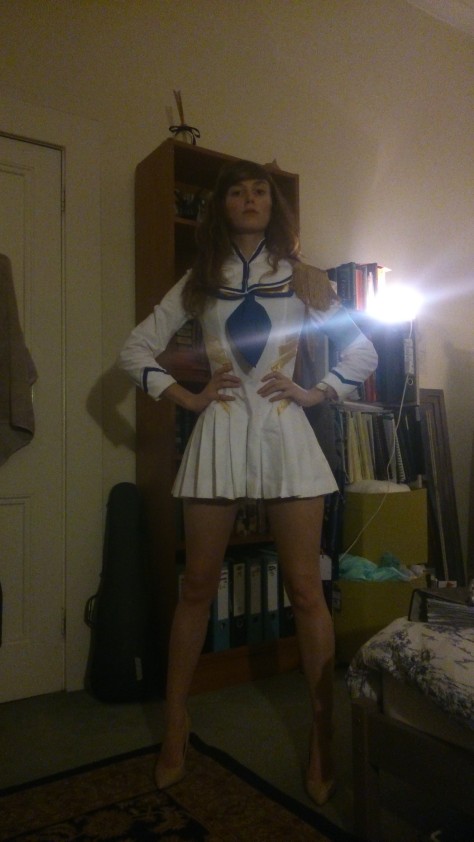
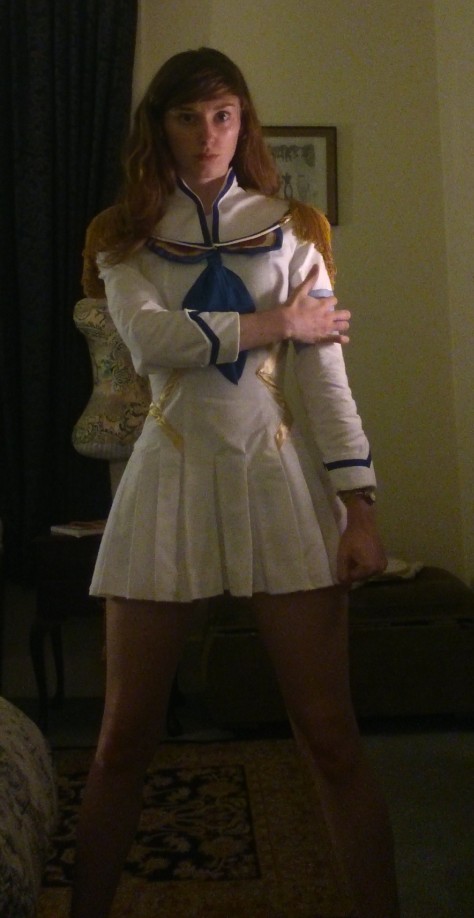
The costume is still mostly but not completely finished.  I finally sewed the boards down, but have yet to stick a hook and eye in the front of the collar or fix up the scarf ties.  I haven’t made a sword or hair clips yet either.  And I need to do some serious work on the boots to stop them falling down so much.  But apart from that, behold!

DSC_1652-2

The wig is super long too:

DSC_1654

And once I had the wig and my face on, I couldn’t help taking dumb selfies, as one does.

Photo on 17-01-2016 at 7.19 PM #3

Ryuko, I am shocked.

Photo on 17-01-2016 at 7.19 PM #2

Naaaahhhhhh!!!!

Photo on 17-01-2016 at 7.19 PM #4

My tea is cold!

Photo on 17-01-2016 at 7.20 PM

What evil plot…?

Photo on 17-01-2016 at 7.18 PM

Srsly Ryuko one more word

Photo on 17-01-2016 at 7.04 PM

Resting Bitch Face.

Photo on 17-01-2016 at 7.17 PM

Notice me senpai!

Photo on 17-01-2016 at 7.26 PM #2

Blue Steel.

Photo on 17-01-2016 at 7.06 PM #2

The Ultra-Frown

Naughty (Thigh High Boots) and Nice (Sproglet-Approved Dragon Plushie)

Naughty first because it’s just a triumphant update:  I FINISHED THE SATSUKI COSPLAY BOOTS!!!  They’re a bit baggy, but they’re my first real proper try (the Attack on Titan ones were just boot covers so they don’t count).  Glued to a pair of high heels and everything.  I’m moving this week though, so I’ll post about them properly later, and for now you can have a photo:

DSC_1602 DSC_1594

Now for nice.  I promised I’d post about the new dragon plushie dragon I made for my friend’s child, especially seeing I never posted about the first one.  It was small and green and made of felt, which was a nightmare to turn right-side out.

DSC_0760

Damn cute though.

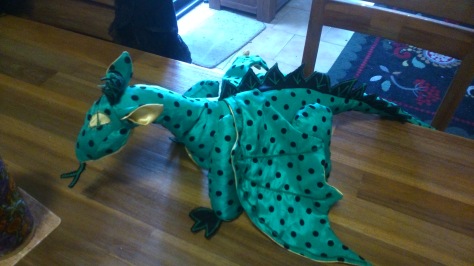
This time I thought I would be clever and make it out of green polyester taffeta with spots on, which would be easier to turn.  On second thoughts I decided to make it twice the size of the previous plushie as well.  Was it any easier?  …Eh?… Kind of?  My advice is not to do this the day before you want to give the plushie to the kid.  Or you’ll be up till *@#$ o’clock in the morning (even though that didn’t matter so much when I saw his happy little face).

DSC_1559

Should you wish to make one of your own, you will require:

-A couple of big sheets of paper (A3 would work well) to draw out your pattern.

-Some measuring tools, ie a tape and a ruler.  If you want to get fancy and get a compass too, by all means do, but I didn’t and I survived.

-About 50-75cm of fabric in the dragon’s main hide shade and about 25cm for the belly, feet, inside the ears and under the chin.  I used polyester taffeta and satin to make for easier lunch-stain-removal.  If you’re giving this plushie to a kid, it’s inevitable that at some point it’ll encounter tomato sauce or hummus or chocolate or all of the above.

-Some offcuts of a stiff fabric like cotton twill or felt (recommended, would have been easier) for the various features like horns, spines, a forked tongue or claws.  Go nuts.  If you want to do button eyes instead of appliqué eyes, you’ll need some of those too.

-Some felt to underline the belly to make it hold its shape better (not compulsory).

Step 1) Nut out a pattern

I broke the dragon down into the following parts:

dragon

  • The back, including the neck and tail (two identical halves).  Once it’s drawn, add a small dart to the place where the neck meets the back in order to round it out more.  Making the neck curve like so at the edge where you set in the head (which for clarity’s sake I will refer to as n) will give the head a charming downward tilt.
  • The belly (one part, cut on the fold).  Make this a half-football shape.  Measure the curved edge and make sure it isn’t too long for the lower edge of the back.  You don’t want it going too far into the tail.
  • The foot base.  This is a circle.  It will be the base of all the feet.  Measure the radius and work out the circumference (2πr thankyou highschool maths).  We’ll call this c.
  • The front leg (cut in two identical halves).  Start by getting your measuring tape, marking half c on it, then bending it slightly to get a shallow curve.  Trace this curve.  This is the bottom of the leg where you will set in the foot base.  After that, you can draw whatever leg shape you like above it.  Trace that base line on another piece of paper though so you’ve got a matching one to build the back leg off.
  • The back leg.  Start with the tracing of the front leg base and then draw another leg shape.  I made mine fatter and with a slight bend for the dragon’s knee.
  • The top of the head (which is cut on the fold).  This is where it gets kind of tricky.  What you want to do first is measure with your measuring tape.  This is what you have to work with re: the edges of the head that attach to the neck.  The top of the head is most important.  Allocate about 2/5 of n for it.  We’ll call that edge h. Draw as a straight line (because that’s easier).  Then measure about 5mm above h and draw a straight line for the fold edge from there.  You’ll end up with this:  Then what you want to do is decide how long your dragon’s head should be and add in some curves to complete the shape.  That 5mm from before will come out as a dart to differentiate the forehead from the neck a bit more and give you a guide for where the eyes go.  Now measure the bottom edge of the pattern piece and write it down.  I’ll call that edge b
  • The chin (cut in two identical halves).  I learned the hard way that it’ll be better to have  some kind of centre seam in the head somewhere, and the chin works.  It can be a straight seam.  Allocate about 1/3 of n for the neck-edge of the chin (let’s call it c).  Make c a straight line, then remember that measurement that you took before?  That is how long the top edge of the chin piece will be.  We will call it b2, using all the powers of our imaginations.
  • The cheek (for extra head-shaping) also has an edge that is whatever is left over of n.  We’ll call that edge k.  It doesn’t matter how long the cheek is so long as it’s the same length on both sides and so long as it’s shorter than b.  We’ll call the upper and lower sides of the cheek e.  They’re the same so I figure they’re interchangeable.
  • The eye, if you want to appliqué, however big you want
  • The wing, as you like.
  • The ear, in a vaguely star-trek logo shape is nice, but really you can do it however you like.
  • Misc other features like spines, toes, tongues etc can be up to you.

Still with me?  Have a picture of the bottom of the dragon.

DSC_1561

Step 2) Cut out your fabric

I chose to do the body, top of the head, cheek, legs and upper wings and ears in green, the belly, chin and under wings, feet and inner ears in yellow and the spines in black.  You do you though.

Step 3) Start your engines  (I’m so sorry I didn’t take any photos…)

I started with the details so I wouldn’t forget any.  I sewed the wings right-side to right-side around the edges, clipped the corners, turned them the right way out and sewed veins onto them in a zig-zag stitch.  Then I decorated the spines, belly and tongue with a zig-zag stitch in green.  I also sewed the dart in the back of the body pieces.

Then you can get down to business.

Pin the body pieces together along the spine with any spine details and wings sandwiched between.  Sew that seam down to the end of the tail and a little way back along the other side of the tail.  Clip the end of the tail and turn it the right way out.

Sew each leg together right-to-right leaving about an inch gap along the top back.  Very carefully baste the foot base pieces in to the ends and sew them in.  If you’re adding toes, do this in the same seam.  It’s fiddly.  Then clip the seam allowances and turn the legs the right way out.  Stuff them firmly (I used cut-up fabric scraps, but you could use commercial stuffing or lentils or whatever), then slip-stitch the gap at the top firmly closed.

Get the head-pieces ready to go on the body.  Sew k to right-to-right with the wide end of the cheek piece level with on both sides of the top head piece.  Then add on each side of the chin, with the edge of the cheek pieces level with c.  Then you can add eyes to the dragon however you wish.  I just appliquéd mine on with a zig-zag stitch.  I also added a forked tongue.

Now sew up the ears (if you want them) and more spines (if you want them) and baste them to the top of n on the body pieces.  Baste or pin the complete head on over the top, right-to-right, ensuring that the centre chin edges are level with the bottom of the neck.  Too long is better than too short, and if the head edges are too long you can just pleat the cheeks a little to bring them level and it’ll give the dragon a slightly chipmunky appearance.  Sew this seam, then turn it all the right way out and check that you’ve caught all the bottoms of the ears and spines.

Turn the whole thing inside out.  Carefully fold the wings up and baste them so they won’t get caught when you sew the belly seam.  Starting at the chin, sew straight down the centre seam of the dragon, attaching the belly to the other side of the body, and then stop at the end of the belly.  From the other side, sew the bottom tail seam up, leaving about a two inch gap so you can turn the whole thing the right way out.

Turn it the right way out (it will be frustrating).  Check that everything’s ok and you haven’t sewn the wings into the belly, and then you can stuff the whole body and slip-stitch the gap closed.  Then I added the legs.  A curved needle would have been useful here, but I didn’t have one and I managed.

Step 4) Give it to a kid

This is the fun part.  The kid will hopefully hug the crap out of it and then start explaining to you that it’s actually a water dragon and it likes to cook with chocolate even though it can’t eat chocolate because dragons eat meat.  (This is legitimately what happened).

DSC_1560

The kid hopefully won’t care that the spine’s wonky.

See you after I move!  I need to post about some exciting things like SHORTS.  YES, I MADE SHORTS.  I’M SO PROUD I’M ONLY TALKING IN CAPITALS FROM NOW ON!  Stay (vaguely) tuned!


Opera and Cosplay Duke it Out

When I last posted I had this vision that a heap of things were going to be done by now.  I was going to be finished the Junketsu and I was going to have worn it triumphantly at PAX.  I was going to be churning out shirts and skirts and things for summer.  I was going to have finished all the performance dresses that I stupidly started right before comps and concerts.  Hell, at one point I even thought I would make a gown.

Haha, NOPE.  It’s a crazy story.

So I entered the New Zealand Aria the night before entries closed.  Then I realised that it was on at the same time as PAX so there was no point finishing the Junketsu (wrong, but we’ll get to that in a minute).  Then I cut out two Man Repeller-inspired ruffled shirts for My Wardrobe S/S 16, but sewing the pleather for my Attack on Titan cosplay had killed the tension wheel on my Janome and it went off to be serviced.  Two weeks of waiting for it to come back and consoling myself with fan art later…

Kyojin_Con

I tend to only ship characters with musical instruments.

…I should have done all the finishing on the fuchsia performance dress then, but stupidly I chose to binge on Noragami instead.  Then I did an audition for Opera Australia in Sydney.  Then I got a callback, so I had to cancel on New Zealand SO THE MORAL OF THAT STORY IS IF I’D JUST FINISHED THE DAMN JUNKETSU I COULD HAVE GONE TO PAX ANYWAY.  I was sad and happy and confused so then I entered the Diamond Valley Eisteddfod (again the night before the damn thing.  Noticing a pattern?). I hand-hemmed the fuchsia dress at the venue on the day, and then I won the aria section.  Then I found out I had the job with OA.  Then I didn’t sleep for about 48 hours.  Now I’m doing weird random procrastinatey sewing things instead of finishing the summer clothes that I know I’ll need up north.

Like how I suddenly decided that the arm and pocket badges on my AoT jacket look wrong and need to be fixed.  The method I’m  using now (just appliqueing on a big general wing-shaped cut-out and then zig-zagging the lines on over the top) is a lot quicker and easier than the first method I used, and I think it reads better too.

DSC_1540

DSC_1541

Way better, right?

I’ve started on one of the summer shirts, but I’m currently baulking at the buttonholes because my machine is still a bit hit-and-miss with buttonholes.  It’s just the frumpster shirt pattern with the sleeves cut in further, and a ruffle on a strip of bias binding added over the top.

DSC_1543

If it looks like it’s spent the week scrunched up in a corner, that’s because it has.

The Junketsu has now been hemmed.  Behold it in its shortness if you dare, along with my best attempt at a faux-fringe (which really just ended up looking kind of vintage.  Oh well.  Satsuki’s kind of a pin-up anyway).  I ordered a wig online yesterday, taking my chances with a random cosplay wig shop on AliExpress.  The shipping times are so variable that I just put in the address as my parent’s place in case it takes a month and I’ve moved out of the sharehouse, so Mum, if you get a very long blue wig in the post please don’t get a shock.

DSC_1528

As if getting a wig in the post could be any more shocking than the length of that skirt.

I have decided I’ll attach the sailor collar with snaps, but the ones I have in my stash are tiny, so I’ll zip out to somewhere and get bigger ones.  I’ve glued  I-don’t-know-what-you-call-thems on the boards.  They’re the bits that you pass epaulettes through to button the boards on.

DSC_1542

They don’t look very nice because I glued them on and used Fray-Block to finish the edges.

I will add epaulettes to the Junketsu and then the boards can button or snap on.  I was worried that the boards were too big, but even just pinned on they look really good.  The scarf tie things are another story though.  I’ll take them off and make them smaller and pointier.

DSC_1534

With both boards in dynamic pre-transformation pose

I’ve also ordered the white stretch-PVC for the boots, and I’ll put them together on my friend’s serger, because I really don’t want to be servicing my poor old machine twice in as many months, and comparing my sewing machine to Sergei the serger is like comparing an elderly lady who’s still ok walking the dog with some kind of super hardcore Russian SAS person with muscles on their muscles.  Then I’ll get a pair of op-shop heels and glue them over the top.  The PVC was a bit expensive, but there’s really only one place in Australia that had it and I only need a metre for my scrawny pins so it’s not that bad.

Then the only thing will be the sword, Bankuze.  It’s basically a big white katana with a fancy cross-bar (no idea what you call that part on a katana, and behold my apparent inability to google it).  The internet has many which are expensive, not super great-looking and of dubious customs-passability.  I’m contemplating how hard it would be to make a passable Bankuze-like-object out of cardboard or papier mache or plastic or something.  Satsuki doesn’t even usually bother to unsheathe it unless she’s fighting Ryuko anyhow.


Attack on Cosplay Part Two – The Thousand and One Infuriating Straps

I’m not gonna lie, I would seriously rather hand-sew another set of 18th Century stays than make another Attack on Titan harness.  True, the stays took me like 8 months longer, but they didn’t involve trying to make my craptacular Janome come to terms with pleather.

Internet research confirmed that pleather is a special snowflake, and because it’s both stretchy and sticky, it needs extra help to go under the presser-foot without bunching and puckering.   Some recommended a roller foot (sounds awesome but couldn’t get one), or the ol’ paper trick, where you pin paper over the fabric and rip it off after.  Others recommended a teflon foot, which I got, as my local Janome dealer didn’t have a roller foot.  The poor shop lady looked at me with plain distress on her face when I said ‘cosplay’ and ‘pleather’ in the same sentence.  Sadly, when I got the foot home it only kind of vaguely worked, more on that later. Pleather’s other extra-special attribute is that it doesn’t like pins, because it’s not woven and pins will leave holes.

But this is me we’re talking about, and I like leaping in at the deep end without checking for pointy rocks/stingrays/Cthulu first.  I already felt I’d done enough planning by drawing up a ton of notes on what attaches where.  Bear in mind there are much MUCH better diagrams in google images, and even though I’d drawn these out, there was no guarantee I’d follow them perfectly in the moment.

DSC_1320 DSC_1322DSC_1321

Haha, even just reading those back now there are so many places where I deviated from the plan.  Because I am Captain By-The-Seat-of-My-Pants.

So first I just made oodles and oodles of strapping from the pleather, with the non-stretch direction lengthways. Turning a tube was too hard because the right sides stick to each other, so I folded an 8cm-wide strip in half, wrong side to wrong side, topstitched the fold, then folded in the other edge a cm or so and topstitched it too.  Because by that stage I hadn’t had a chance to haul my butt to Maribyrnong to get a teflon foot, I used the paper method, and because pleather dislikes pins, I used bobby pins.  It helps that because I have stubborn hair, I have extra-strong bobby pins.  BOBBY PINS ARE THE ANSWER TO EVERYTHING.  Also, if you are someone with Hermione-levels of hair like me, you probably already have loads of them lying around.  If you have short hair/love office products, I hear paperclips work too.

DSC_1201

Yes, that’s La Traviata.  It was in an old subject reader from my undergrad so it was an excerpt anyway.  I wasn’t sacrificing actual sheet music.  The paper rips very cleanly off in this instance because the pleather doesn’t try to come with it the way a knit fabric does.

After I’d made metres and metres of the stuff, I started with the back pad and made my way down from there, sometimes using Dido the dressform, but trying it on me every now and again because sometimes she goes a funny round-shouldered shape that’s not helpful.

The back pad (and both the scabbard pads, for that matter) were a cheap grey poplin underlined with felt leftover from a dragon plushie I made for a friend’s five-year-old a while back and forgot to blog about.  Problem is, this is the colour of the felt:

DSC_0760

Naw, how cute was it before it got loved to death?  Anyway, back to AoT.  Turns out when you underline grey poplin with green felt and then expect to cut what are effectively large buttonholes for straps to pass through, you inevitably see the green felt on the inside of the slash, like your harness is secretly Bruce Banner or something.  Not a massive problem, but weird up close.  And cartoon-prompting.

DSC_1342

DSC_1182

Have a very dark photo of the pattern, because I can’t be bothered lightening it.

Then it was a matter of trimming straps to size and adding them one at a time.  The upper back first, then the sternum buckle, then from there.  Somewhere along the line I realised it’d be easier to make the whole thing in one rather than trying to keep the top and bottom separate.  I’m sorry I didn’t take better notes as I went, but it was pretty damn confusing, the whole process lasted a couple of weeks and I’m not entirely sure I knew what I was doing at the time.  There was wine was involved at several points.  Also some pretending to be Levi, some pretending to be Veronica Lake, and some wearing the flower crown from when I was Woodsprite 1 in Rusalka earlier this year. Pro-tip, don’t drink and sew, and definitely don’t let a soprano have access to wine, cosplay and a camera at the same time.  Do have a montage though.

DSC_1193DSC_1194DSC_1206DSC_1208DSC_1210DSC_1220DSC_1212DSC_1260DSC_1240DSC_1229DSC_1230DSC_1255DSC_1290DSC_1268

By the end it was crazy trying to get the whole thing under the needle…

DSC_1221

And sometimes I resorted to some dumb tactics…

DSC_1222

Most of it was sewn together using a variant on this criss-cross pattern:

DSC_1329

Right up the top in that photo you can see what I mean about the green felt too.

Some of the details ended up being pretty crucial.  For example, I realised early on that it’d be silly to permanently attach any of the straps to the scabbard pads in a way that they couldn’t move.  So this is the arrangement I came up with on the back, using fabric loops.  The thigh straps just feed through enormous buttonholes the way the shoulder straps do in the shoulder pad:

DSC_1326

The buckles were just sewn on and the holes for the latchets were made with a stitch ripper because my awl (and by awl, I mean very sharp pencil) didn’t work.

DSC_1328

I didn’t end up attaching the straps at the front with buckles to the belt because I couldn’t really think of a way to do it, I ran out of buckles, and really I was just looping them around the belt loops of my jeans and using the belt (which is totally separate) to hold them down.

Here it is in its completed (if slightly dodgy) glory:

DSC_1323 DSC_1324

I tried taking a couple of videos of putting the whole catastrophe on to see if I could document it clearly, but it didn’t make it any clearer and it takes roughly ten minutes (I can see why humanity is dying out if it takes their strongest members that long to get their kit on and off, you know what I mean?), so make do with a talkthrough:

  1. Lay the catastrophe on the floor, front side up.  Make sure nothing is tangled (HA)
  2. Sit yourself down smack-bang in the middle.  Shimmy thy legs under the bit that will cross over just below your stomach in the end.
  3. Then get each leg down into the leg loops until your feet are at the bottom.  Make sure nothing’s twisted again.  If something is twisted, swear at it for a while until it goes away.
  4. Do up the thigh straps.  Adjust the crap out of all leg bits so that everything sits where it should.
  5. AWESOME FUN TIP: Put on some socks now!  It’ll keep the foot loops from leaping off your feet when you stand up, and stop them squeaking like you’re walking through a rubber ducky warehouse in stilettos when you put your boots on.  My socks have cats on them.
  6. Grab hold of the back pad over your shoulder and stand up.
  7. Squiggle all the straps up over your bum at the back.
  8. Pop your arms through the arm-holes at the top and shimmy the top half on without throwing your neck out.  If you can’t turn your head after, time to swear some more and then call the physio.  Make sure those straps aren’t twisted first though.  See earlier swearing comment.
  9. Do up the sternum strap.  If you are a boob-owner and need to move yours out of the way, do that now too.  If you just have massive pecs like Captain America I can offer you little advice except good on you for having them, and can you do that thing where they pop individually?  That’s hilarious.
  10. The ends of the straps that come from the back button on around the front ones (because I found if I sewed them down I couldn’t get my hips through it.  Your mileage may vary if yours don’t prompt strange older women to compliment you creepily on your physiological suitability for childbirth.)
  11. Now’s when I add the belt over the top.  I’m about to tell you about the skirt too. If you’re still reading that is. If you’re not then I guess I can call you a spleeny bat-fowling scut and you’ll be none the wiser. Thankyou Shakespearean Insult Generator…

The skirt thing was a lightly shaped arc thing with holes for the belt loops so I could still put the belt through them.  It tied on to the belt loops with little ribbons (aww).  It goes on after stage 10, and there are slits for the belt loops of the jeans to go through so that the belt can still be threaded through them.  Then the ribbons are tied on to whichever strap is closest.

DSC_1332 DSC_1333

It’s pretty hard to see in these photos.  Sorry.  The areas of shaping and the edges were folded over and topstitched, and this is where the teflon foot came (vaguely) in handy.  Vaguely because it was only a bit better than the metal foot, but on seams in the middle of a piece of pleather the paper method gets a whole lot harder.

The bit that really made sticking hot forks in one’s eyes sound like fun was the boot covers.  I loosely followed this boot cover tutorial, mostly because I didn’t want to have to destroy any of my shoes and I didn’t want to buy any new ones to cover.  First I was going to cover a set of riding boots that I can be seen wearing in most of the above photos, but the problem is I have scrawny wee calves, so the boots aren’t fitted.  So the first one looked completely wrong and the top flaps were more flops.  So I re-drafted them to go over a pair of ankle boots and then fit directly to the leg.  Much better from a fit perspective, but such a nightmare from a topstitching perspective.  And the teflon foot did a very half-arsed job. Then when I thought I was out of the woods, the top flaps were still disappointingly floppy (yes, I’m being dirty, you love it) because the pleather was quite soft, even after being interfaced with heavy linen.  So I went with my usual sewing panacea of using twill tape to create a bone casing and putting a cable tie in it.  That appeared to help.

DSC_1281

The other inaccuracy was that the cords on the AoT boots are brown.  But I had green rat tail left from when I butchered the green soprano gown (the gown as it was, and as it is now and ever shall be).  So I have green cords on my boots.  Shh.

DSC_1337

You can’t really tell, right?

DSC_1286

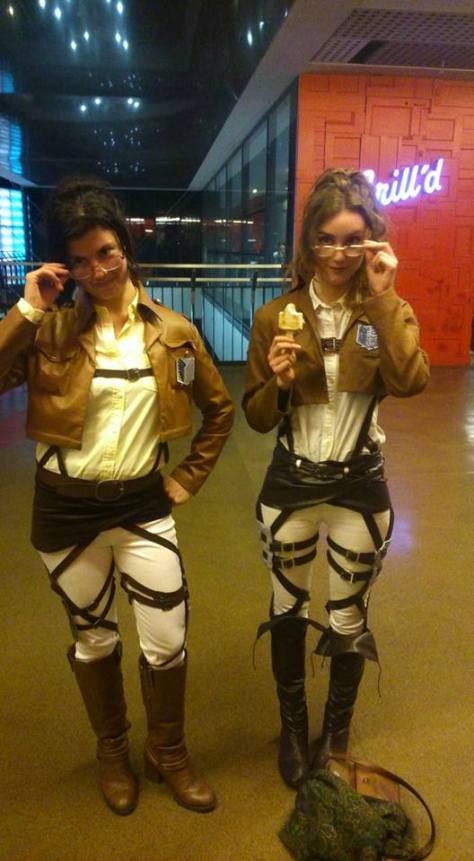
So that’s a wrap really!  I’ll make a cloak at some point to add to it, but I’ll wait for the perfect green wool so that it’ll be warm and rain-repellent and heavy and gorgeous. In the meantime, have some more pictures of me and my friend having fun outside the movies in our costumes!  I may have taken to photoshop and done a Who Framed Roger Rabbit on two of them… couldn’t resist.

2Hanges1

Two Hanges are better than one.

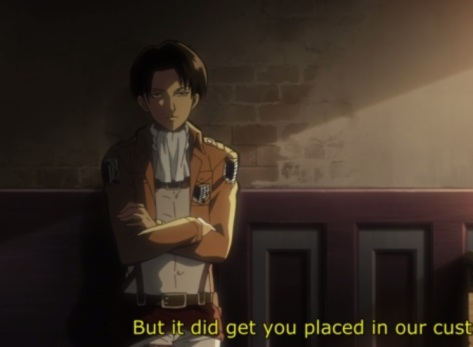
2Hanges5plus_grumpy_Levi

Levi’s kicking himself he picked the berry paddle-pop when he could have had dulce de leche but didn’t want to look like he was copying Hange 2.

2Hanges4_plus_scared_Eren

Eren’s wondering if the Hanges would catch him if he tried to escape.

OH!  And if you haven’t already done so, check out the Society 6 store I just got!  I do way more art than just photoshop characters into silly photos, and you can get it on a mug or a phone case.  It’s pretty awesome. 🙂

Attack on Cosplay – Jacket Potato (Sasha wishes…)

That Attack on Titan cosplay I hinted at in my last post is done.  Done and worn and everything. Though, if you know me on like any other form of social media you’ll already be sick of it, so if that’s you, I’m not going to be offended if you sit this one out.

If that’s not you (or if that’s you but you want to know how I made it/feel some weird obligation to read everything I thoughtlessly spew forth like some kind of projectile-vomiting random word generator), strap yourselves in.  It’s probably going to be a several-post ride.

First, BEHOLD IT IN ITS FINISHED GLORY!

2Hanges1

Double the Hange = Double the chance Eren’s getting dissected today.

Now onto the iconic jacket, before I totally forget how I did it.  I didn’t take loads of photos because for once I really got into the flow of it and who has time for photos when they’re in the zone.  Eye of the tiger.

Stage The First: Draft It.  Draft It Good.

Step one (which probably isn’t all that helpful for anyone who’s not into this sort of technical crap) was go to my copy of Natalie Bray and nut out a jacket block from my standard bodice block pattern.  This took me longer than anticipated because my standard block is a helluva lot snugger than the one Natalie recommends, partly because it’s not 1968 and partly because I make a lot of dresses that need a no ease/negative ease block.  But it still didn’t take as long as I’d anticipated, so win.

DSC_1309

Then I found a picture of someone in a jacket standing nice and still in a well-lit place.

armin jacket

Extra helpful because Armin’s build is me without the hips, so I can see how the jacket should sit.

 Thanks, Armin, you’re a gem.  None of this lurking in the shadows business like other people we know but love anyway.

Untitled

“Shut up.  Sun-safety is almost as important as cleanliness.”

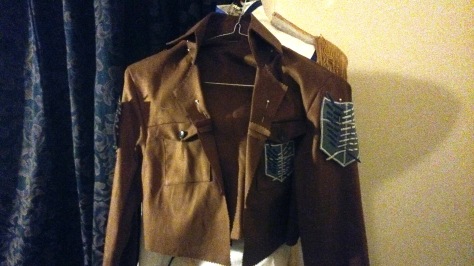
Then I wrote a giant sticky note of all the design elements and how they would relate to my pattern draft.   I stuck with a pretty simple pattern in the end – no shaping except a tiny bit at the side seams to stop it kicking out at the back, and a yoke seam to tidily hide a little shaping at the front.  It was mostly going to be hidden under the patch pockets anyhow, so I didn’t worry about the fact that no yoke seams are apparent in the anime or manga.  The sleeves are a slightly widened version of the sleeve from my shirt pattern, as I find it almost impossible to draft a sleeve based on my top-arm measurement (thanks, broad bony shoulders and skinny arms, so helpful).  The collar went through a couple of revisions, because in the first toile (yes, I know, I made one for a change), it was ridiculously small.  This was what I ended up with:

DSC_1310

DSC_1311

I’ve lost the toile and I didn’t take any pictures because I’m scatty like that.  It basically looked like the finished jacket, only without sleeves, and in some ghastly aqua poly-pop.

Step The Second: Hunt A Fabric

Fabric-wise, I originally wanted a lightweight wool because I thought it would a) be nice and b) be warm, but the Fabric Store had nada (they did have a nice brown pleather though, more on that later), the internet had zip and Spotlight had cotton duck in as close as I was ever going to find to the right colour.  If I ever, ever find wool in the right weight and colour, I would totally re-make the jacket because I think it would look damn spiffy in wool.  But alas, cotton it was.  In a slightly more burnt shade of caramel brown than what was required.

Step The Third: Sew For A Bit

So I set to work cutting it up and sewing the body of the jacket together, cut out the collar,  prepared the collar, and starched the hell out of the collar (seriously, starch is my favourite thing.  I went so overboard on the starch).  With the collar, because the cotton duck is heavy, I fiddled around with what’s called ‘turn of cloth allowance’ or ‘roll allowance’ (the blogger at that link also does an excellent collar-drafting tutorial, and pretty fabulous tutorials in general).

Step Four: Get Distracted (But Productively, I Swear)

Then I got sidetracked making patches.  Because I was being silly frugal, I went with fabric scraps I had to hand.  I had some cotton jersey in a good blue-grey colour (from the sailor pants) so I underlined it with the cotton duck and then for the three smaller patches I just machine-zig-zagged the wings on in a vague, haphazard manner that makes them look more like the scribby ones from the manga as opposed to the neat tidy ones in the anime.  Still better than the muddy faded ones in the movie.

DSC_1139

Flügel der Ungleichmäßigkeit

For the larger back patch I appliqued on pieces of navy and white fabric.  I tried to find some offcuts from the Junketsu for the white bits, but failed, and used white cotton moleskin instead because it was there in the scrap-box, which in retrospect was a mistake because fluffies were everywhere.  The fluffies seem to come off after a while though, so maybe it’s not the end of the world.

DSC_1167

Then, dear readers, I made a classic rookie error.  I should have sewed all the patches and the epaulettes on now.  While the pocket and sleeves were still not sewn on to the jacket.  You see where I’m going.   But no, I was in the zone and getting ahead of myself and I was too excited researching how to line the damn thing about practical stuff like that.

Stage Five: Have Soprano Tantrum

The other reason that sewing the patches on the sleeves before attaching them would have helped is that it would have stopped me having the terrible time I had the night I ended up sewing on both sleeves on inside out and/or back to front.  Multiple times.  Having the patches as an obvious visual marker to say THIS IS THE RIGHT SIDE would have been amazeballs. Just goes to show, always make sure you have the right notches matched up, and don’t overthink what way is right-side-to-right-side.  The Road of Overthinking leads through the Vale of Eternal Stuffups.  On the way to the Gorge of Angry Soprano-Harpies.  I ended up putting it away and watching almost all of Glitch (HEARTILY RECOMMEND) to calm down, and then got the jacket back out of the Naughty Corner the next day and unpicking and re-sewing the sleeves.  I may have cried when I got them right.

Stage Six: Collar That Puppy

The collar went together exactly like a shirt collar.  Some people struggle with shirt collars, I hear.  I found the tutorial antidote to shirt collar struggles many moons ago at Male Pattern Boldness, as Peter is a gun at shirt collars.  This post and the couple that come after it show what good collar sewing is all about.  I’m too lazy to bother with interfacing, however, and just starched the crap out of my collar instead.

Then I sewed up my pocket flaps and attached them and the patch pockets, adding the buttons from my stash and buttonholes too.  And the epaulettes because I’d forgotten them earlier.  There was much weeping and palming of faces.  I’ve noticed that I also tend to forget the epaulettes whenever I draw cartoons involving AoT characters too, so I guess I’m just a little epaulette-blind.  If they’re not enormous and dripping with gold fringe, what’s the point of noticing them, right?

DSC_1168

Stage Seven: The Lining of the Beast

Then I dug some old navy acetate out of the stash, cut a facing from the brown duck and sewed up and added a lining.  I’m not even going to try to explain this.  It was my first go at lining a jacket anyhow.  So have a link to a tutorial.  This is the one I found most useful, but if you’re in the same situation I was for the love of Dog read the whole thing first before you go step-by-step.  I ended up having to rip out the most perfect bloody slip-stitches because I got ahead of myself.  This series of illustrations was also helpful.

Stage Eight: Glory in Thy Achievement

Put on Blue Steel like you’re God’s gift to the Survey Corps.

DSC_1169

Admire the way the uniform flatters your butt jacket hangs perfectly at the back.

DSC_1176

Give the salute with a cheezy expression of hope and determination.

DSC_1162

And stay tuned for the next instalment, Scheherazade and the Thousand and One VMD Harness Straps.

Kill la Time

I knew that if I started cosplaying it would open a can of worms.  There is sooooo much I need to post about.  I think I remember last time I promised I’d do a post on the Junketsu skirt, and now I’ve got the epaulettes to add to that, and I’ve also started an Attack on Titan costume which desperately needs a post because I levelled up and made a fully-lined jacket.  Every button buttons, every pocket, er, pocketses, and there was a grand total of zero cheating involved anywhere.

How has all this been accomplished around work and singing practice?  Well Victorian noise restrictions prohibit musical instruments after 10pm on weeknights, but seeing I’m technically not an instrument and I’m louder than most power tools (not even kidding a tiny bit there, I cruise at 95-100db and max out just over 110db), and the regulations on those say 8pm, I try my darndest not to sing after 8:30.  That’s when the sewing machine goes on instead.

It also might seem overwhelming because I’ve got a hell of a lot faster.  Partly because I’m actually doing things more efficiently.  Adding seam allowances to pattern pieces, for example.   I think not having to design is helping too.  I just look at someone else’s picture and work out how to make it.  As much as I love designing, from a sewing perspective this really helps because when I know I need 2.5m of caramel cotton duck/twill/light wool because based on the pictures that’s what a Survey Corps jacket requires, I can just get it and leave and then I’m not wandering around the Fabric Store for three hours patting things and dribbling and making no decisions.

So that Junketsu progress!  I’ll save the Attack on Titan jacket for another post.

With the skirt, remember how I said I was adding the side panels in last so that I could retain the clean line through the front pleats?  Well that was… interesting.


DSC_1100DSC_1104

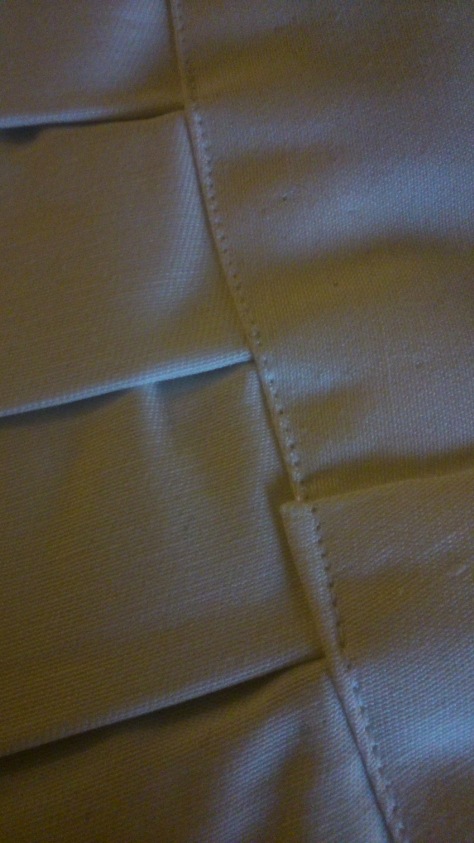
I went with my traditional by-the-seat-of-one’s-pants/visual-measuring method with pleating, after I wasted an hour measuring them out only to find they looked dorky.  It also gave me a chance to line up the edges as perfectly as I could and fernangle them in at the back and front where they attach to the existing pleats that had been cut in one with the bodice panels.  I can’t remember for the life of me how I did it now, but it resulted in a small extra pleat that pops out of the back pleats like so:


DSC_1103

I lapped and topstitched it because I’m lazy and didn’t want to rearrange it once I’d got my pleats just so, and also to avoid any nasty puckery surprises that method may have thrown my way.  The topstitching also looks purdy and helps keep the seam allowances flat and out of the way.


DSC_1102

Well, except where the princess seam is, but bear in mind that this photo is of a tiny tiny area, and this may or may not have been the light level I was working in (shut up.  I know it’s bad for my eyes, I swear I don’t do it deliberately, it just happens.)


DSC_1101

In short, it was a frustrating process but the results were pretty good.  It even left me with lovely convenient little pockets to stick the ends of the gold bias binding in.  You may recall me saying I just pinned it all on there and went for it:

DSC_1120

Behold the evidence.   Pro tip though, use small pins.  Preferably not the kind that are mysteriously blunt when confronted with more than one layer of fabric, but like freaking mini-scalpels when you accidentally get yourself.  Inevitable when you have that many pins in a heavy, bulky, curvaceous garment that you need to turn around six million different ways under the needle. The ends of my fingers look like Deadpool’s face right now.

And lastly the epaulettes.  I used a pair of my dad’s old boards that I had lying around (I think he gave them to me for a costume party in highschool), as a template and then rounded them out a heap at the ends.  I cut a heavy cardboard layer, and for the first one I sewed fabric covers on (the second one I got lazy and bought glue), and then painted them gold.  Then I got cheap piping cord and glued that on, also painting it gold so everything would match.  Buttons from a nasty old cardigan were added and painted too.

DSC_1140

Then I hauled my butt out to Spotlight (it’s only like a twenty minute drive, I shouldn’t whinge), and got gold fringe (and now I’m wishing that I’d bought a roller foot for my machine at the same time, because I’m doing this right now instead of going to Spotlight.  Also because there are gas works going on in my street today and I’m not even sure I can get the car out).  Fortunately I’ve got a good colour memory so the colours are a perfect match.  Is colour memory like pitch memory, do you think?  I don’t need a tuning fork.  I am the tuning fork.  Can produce A 440 on demand so long as the demander is polite.  Anyway. I used a double layer of fringe on each one because one layer seemed kind of stingy and a double layer looked thick and luxuriant. I got a metre all up and had only 5cm left over, so it worked out well.  Neither am I regretting going to town on the length of the fringe.  I had my doubts in the fluorescent-light-bathed aisles of the Maribyrnong Spotlight, but if there is one thing that Kill la Kill cosplay should not be, it is underwhelming.

DSC_1141

Then more glue and a mug-plus-gaffa-tape contrivance to allow it to dry.  And I’ve got to add, I have an ancient tube of this stuff called ‘Fray-Block’ which claims to ‘secure serged threads’.  I have no idea from whence it came, but it is magical stuff and it works a treat on say, cut edges of fringe and cord without resorting to the unsightly bulk of a big ol’ glob of glue.

DSC_1143Full credit to my lovely baroque flute friend for the epic tea-cozy.  She doesn’t just flute, she knits and sews and shoots arrows like a boss too (not even kidding, she shoots actual arrows).   And here is the Junketsu in its current state, just waiting for some finishing touches and an enormous pair of boots.  (You thought I was going to say something different there, admit it.)

DSC_1178

Oh look!  You can even see a tiny bit of a certain jacket in the corner… I wonder what that could be for…  *sticks hands in pockets and walks away whistling in a manner both knowing and irritating*


Ask Not the Sparrow How the Eagle… er… Sews.

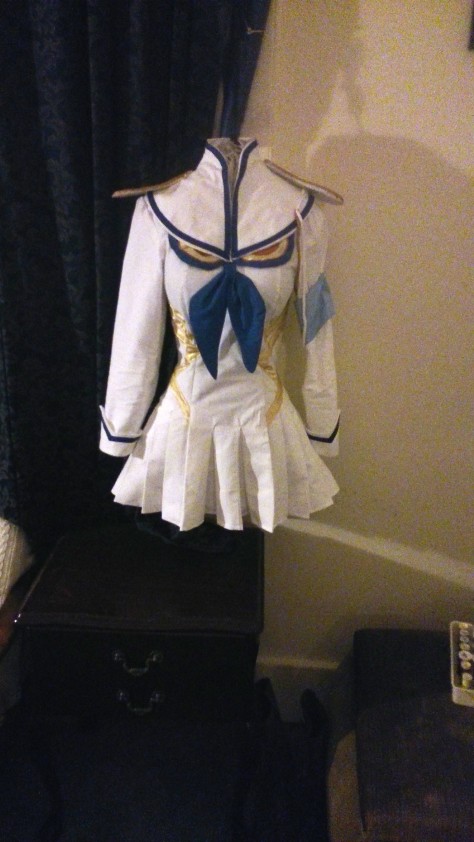
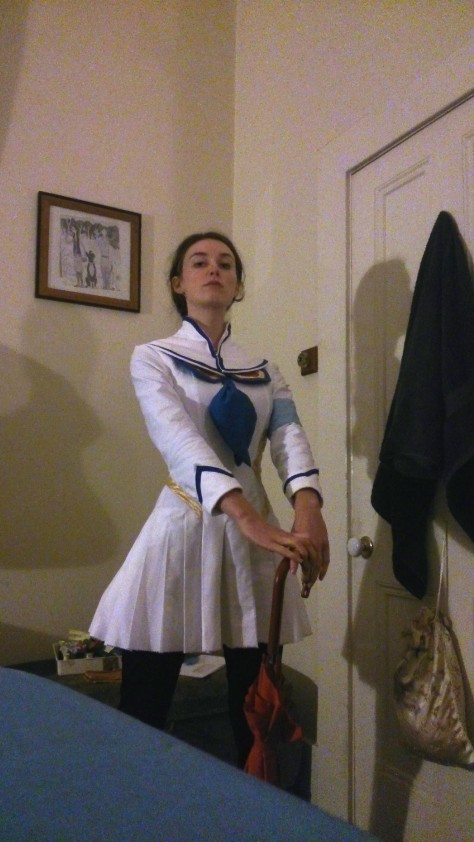
The Junketsu is nearly done!

DSC_1135Even though, come to notice it, his ties (moustaches?) are a bit big.
DSC_1136

Hells yeah for the stripe matching!

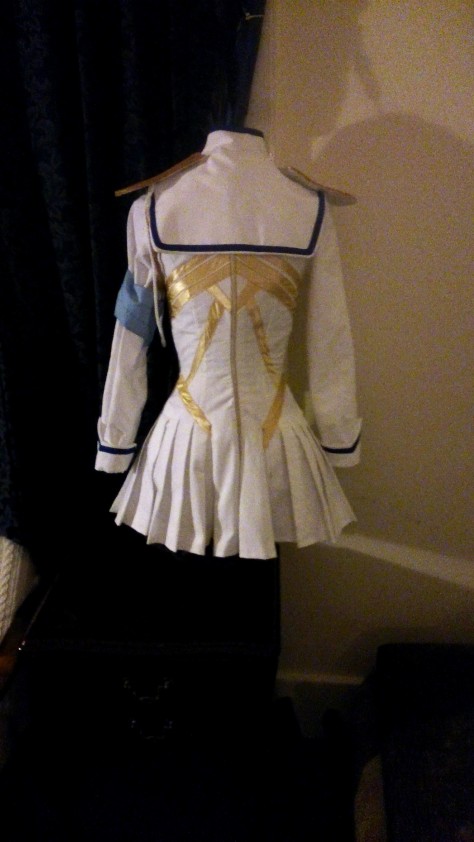
I’ll upload some closer shots of the different bits in a post or two to show how I did them, but at this stage the only real differences from my last post are:

1) The skirt and sleeves are on.  So are the cuffs. They’re a little shallow for total accuracy, but behold the proverbial barren field where I grow the craps I could give.  The skirt was an… interesting step, and I think the order I thought to do things in wasn’t optimal, but it still worked out in the end. It pretty much needs a post to itself.

2) Bias tape.  I bought the blue bias tape because I hate making bias tape with the kind of instinctive disgust that snails reserve for salt (except without the frothing and dying part).  That said, all the gold stripes are bias tape that I made from a fabric that bears an uncanny resemblance to the faux silk that my alma mater uses for Environments degree hoods.  I think it’s literally the same stuff.  (Hannah and Thom does this look like ‘manila folder’ colour to you? Cause it does to me.)  The advantage of using bias tape for the stripes though is that it can be fernangled around corners and curves with relative ease, thus negating the requirement for patterning of any kind.  I just stuck the dress on the dress form and pinned it all on.  Then I sewed it all on, which was harder because of the bulk of the garment and also because that stupidly slippy synthetic satin (are you feeling alliterated yet?) squiggled around a bit while I was trying to sew it.  It probably didn’t help that I was watching Attack on Titan OVAs at the same time, but I have no regrets.

3) The zip is in.  I was terrified that it was going to be too narrow across the back and I was going to bust the zip, but it’s stood up to an experimental trip to the kitchen for tea with my favourite housemate, so I remain hopeful.  The zip is a sturdy thing that I salvaged from a fugly dress from a theatre garage sale.  (Translation: I don’t care that it’s not a white invisible zipper because frugality for the win!)

4) The armband, which sucks and I want to redo.

5) The epaulettes are coming along.  They’re a bit big, so I might shave some off the back ends, but I think I’ll see about that once the fringe is on.  Which will happen when I actually get some fringe.  Which might happen when I get paid.  Maybe.  The gold cord is cheap white piping cord which I’m painting, because it was 60 cents a metre and I already had gold paint lying around, and actual gold cord was like, $5.00 a metre.  No brainer.

6) It has been hemmed.  It’s now short enough that it would not pass muster at any school with a dress code.

The stuff that’s left to do stands thusly: work out how to attach and fasten the floating collar, trim the epaulettes, work out how to attach them (I’m thinking the trad way because that’s how I roll), make the boots (eep!) and hairclips, buy a wig, and buy a katana.  Because it looks silly with an umbrella:

DSC_1132

Subjugation is liberation… from precipitation?

Back in the (Shirt/Cosplay) Game

I think I’m finally getting the hang of this whole sewing by machine thing (I know, it’s taken me long enough, right?). In all seriousness though, the past month and a bit has seen me get the hang of shirts.  Shirts!  That staple of my wardrobe that I never thought I’d master.  Now I see shirts in shop windows/on the internet/on actual people and, given I have the right fabric, buttons to hand and about 5 hours, I can make them mine for half or a third of the price.  It’s scarily addictive.

It’s also fun toying with the pattern I’m using (which is pretty frumpy), to see what different results I can get and what makes a shirt look fresh.

Stage one of the pattern-fernangling produced this:

DSC_1093Ignore the wrinkles.

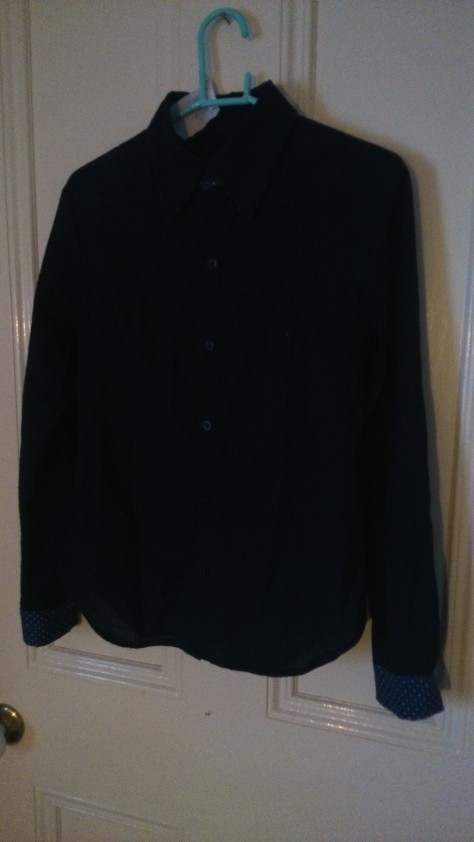
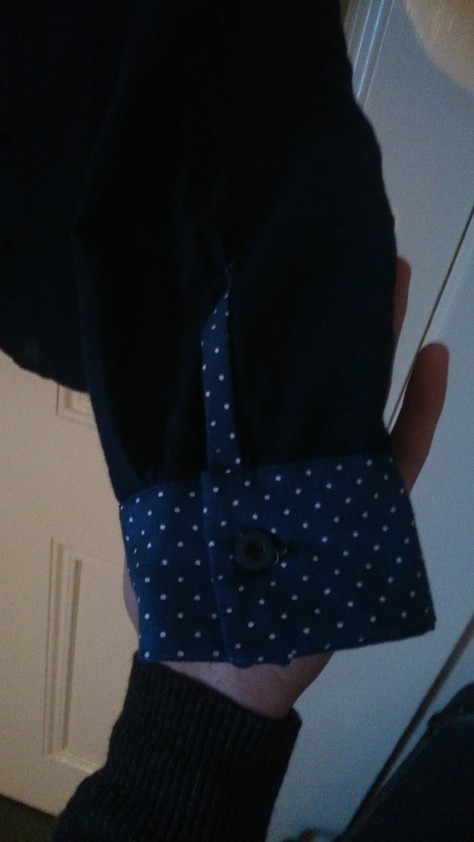
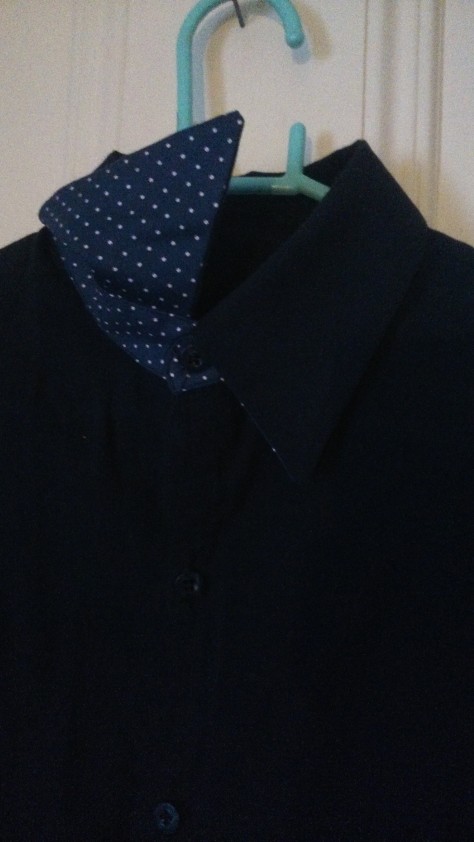
Ie: a navy cotton voile shirt (leftovers from the Bombshells dresses) with contrast cuffs and under collar.  I followed the pattern pretty closely.  I just removed the waist darts and shaved an edge off the cuffs so they weren’t all pointy.  All in all it’s not bad, but I still feel vaguely like a basic soccer mum when I wear it, which isn’t how I want to feel.  In retrospect the recommended distance between the buttons is too far, the collar shape’s still a bit off, curved side seams are stupid and the cuff slits shouldn’t be faced in a heavy fabric.  I’ve learned my lesson.

DSC_1094Not that you can really tell.  But I know.

DSC_1095

Business on top, party underneath.

Using a heavier fabric for the undercollar and outer collar stand was a good plan though, because screw interfacing.

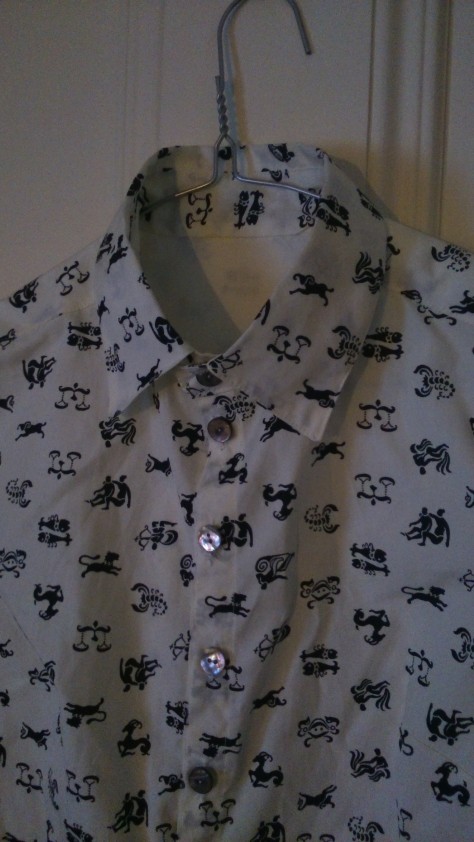
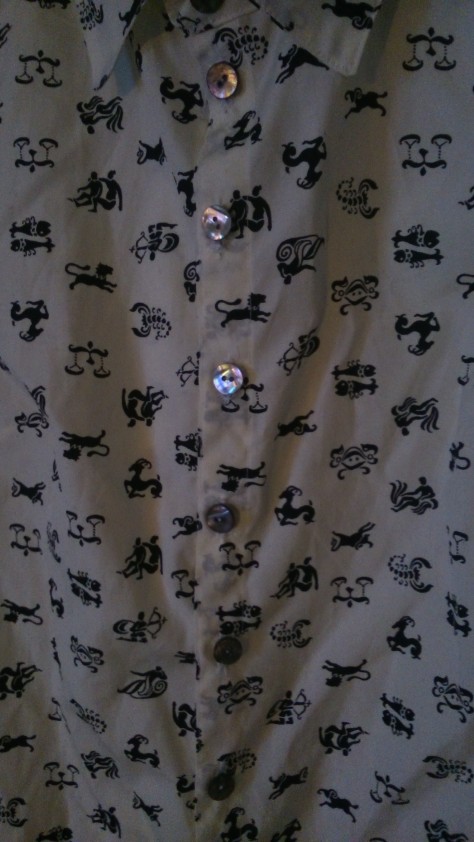
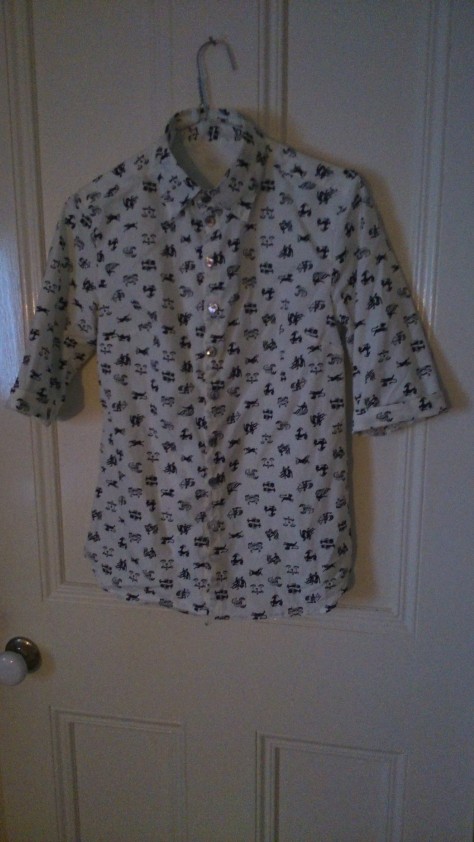
The next experiment was conducted in leftovers from the zodiac dress (which btw I never wear).  I added a 4cm box pleat to the back for added squareness, shaved a bit of the pointiness off the collar, and put the buttons closer together.  I didn’t have enough fabric for full sleeves, so I did half sleeves, rejoicing at how it also meant that I didn’t have to wrangle cuff slits again.

DSC_1092

The angle of the collar is slightly wider and less ’70s.

DSC_1090

Shell buttons are what I had.  Forgive the wrinkles, I wore it yesterday.

DSC_1089

Trust me the sleeves look slim-cut on.

I couldn’t be bothered putting it on to take a photo, it’s freezing here.

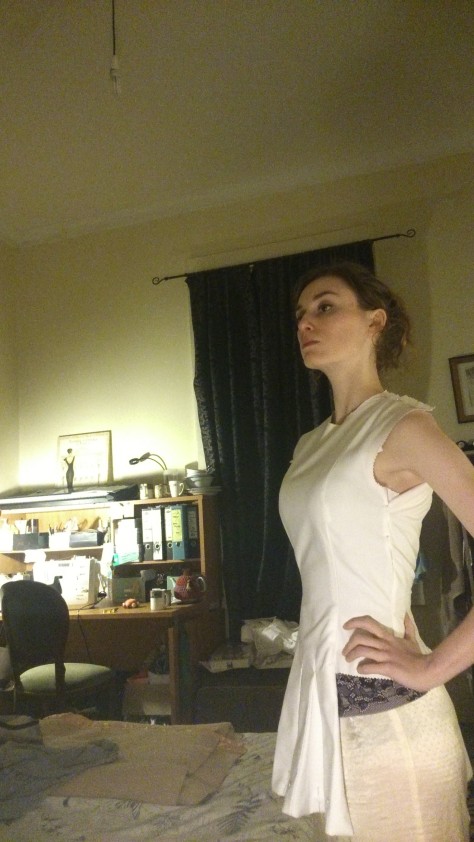
Emboldened, I have embarked upon the foolish venture of cosplay once again.  Not 18th Century this time though.  because when do I ever do the same thing twice? I had to go to the completely opposite end of the spectrum:

satsuki

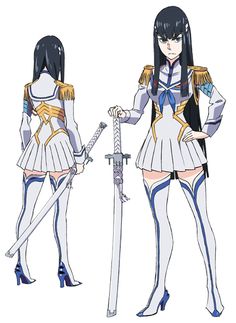
The only character with resting bitch face better than mine and eyebrows better than Cara Delevigne, Satsuki Kiryuin from the decadently OTT anime Kill la Kill.  I really love the design of Junketsu, her uniform.  It’s got a great balance of elements and influences, and just enough patterning challenges without requiring too much engineering or working with awful stretch fabrics (which as I have mentioned before are the spawn of Bealzebub).  Because it’s got a very stiff military aesthetic, I got a mid weight cotton twill, which has got a similar hand to the fabric used in naval dress uniforms, even though it’s a little thicker.  I didn’t want to fiddle around too much with lining, so it had to be thick enough that it’s opaque.

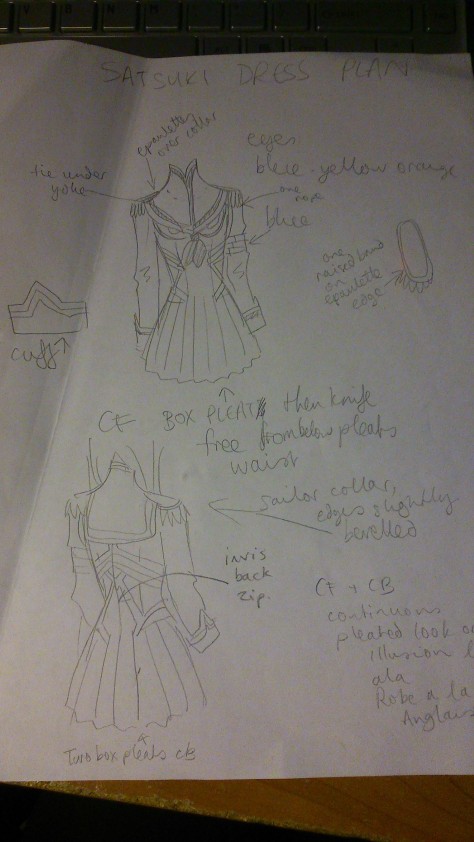
Pattern wise I started off with a plain ol’ princess bodice and worked from there.  Behold my illegible plan:

DSC_1096

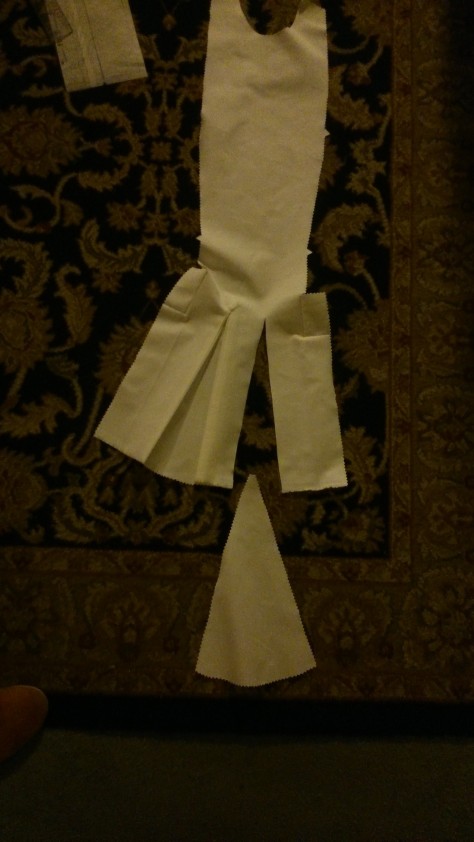
Most of the vertical seams will be hidden by the gold detailing, which is important because this fabric shows its seams no matter how crisp it’s pressed.  Bearing this in mind, I wanted to keep that really smooth effect at the front where it appears as though there isn’t a waist seam and the pleats flow directly out of the front panel.  Solution: godets.  Only, I pressed mine into pleats.

DSC_1076

I think we should call them pizza-pleats.

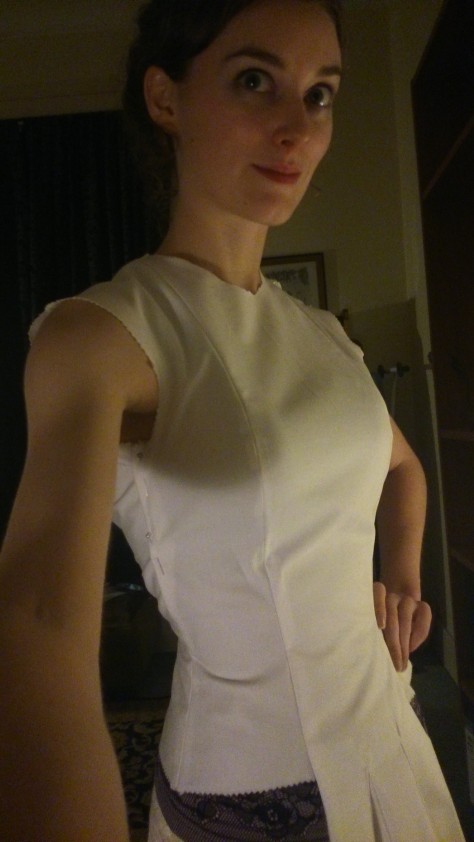
The little square pieces added at the sides are because I overestimated my bodice length.  Of course I didn’t test it with a toile, this is seat-of-the-pants stuff as usual.  Then I added on the side and back panels.  (The skirt side panels will be pleated and pieced in separately, so yeah they’ll have a waist seam. Shh.)    Fitting it, I’ve realised that I need to take it in a bit under the arms and cut the armscyes out more at the back because I have what Natalie Bray refers to in Dress Pattern Designing as ‘especially erect posture’, as well as square, prominent shoulders. The sleeves will be from my shirt pattern, because they work and have enough ease for the elbow-crinkle she’s got going on, and the collar will be a separate piece and I’ll snap it on or something.  This is the stage it’s at now:

DSC_1083

Excuse the pyjamas.

Should have mentioned as well, an extra bra with some socks in it is lending me some aid.  Satsuki-sama (like the rest of woman-kind, let’s face it) is a couple of sizes up from me.

DSC_1084

I think I keep up in the resting bitch face department though.

Dang, you can see the wrinkles that my posture causes though.  Should have twigged ages ago when the pattern book said its recommended armscye shaping was for the ‘slightly rounded posture of today’ (by which they mean, like, the ’60s).  My back’s more like a board.

Next step, skirt side-panel wrangling, sleeves, collars and cuffs.  And then I can get to do the detailing, order an enormous wig and a fake katana, and work out how the hell I’m going to do those boots.  Other cosplayers before me have used stretch PVC over a boot or shoe, and held the resulting boot-stocking/leg-glove up with Hollywood tape.  The thought of my cantankerous Janome encountering stretch PVC makes me shudder.  It’s bound to be exciting.