I said I’d post about the construction of that robe a l’Anglaise later, and this is later, so here we go. In case anyone else is crazy enough to muddle their way through one of these as a beginner, here is my experience doing just that, for better or worse, with all the links to things that I used.
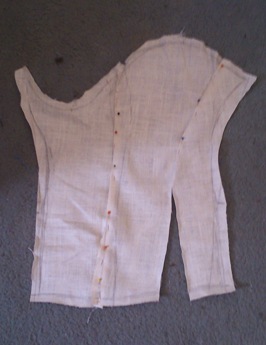
I finished the stays first (well duh), in all their historically inaccurate glory. The multicoloured thread is particularly great. You can just see it here in this picture, where I’ve only lined half. Luckily, extant stays are pretty messy on the inside too, so I don’t feel quite so bad.
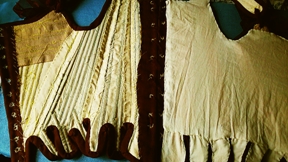
Messy, neat.
Basically, I drafted the pattern myself, flying very much by the seat of my pants and relying heavily on the stays-related posts from the Mantua Maker and the Dreamstress, because they’re professionals and know what they’re doing. Mine are nowhere near as nice, but they are my first set and they do the job. I decided on a 1780s-y ‘prow-front’ shape, made a toile and fiddled with it until it vaguely fit me. Then I cut out the two layers of calico (because I’m a cheapskate), basted them together around the edges, sewed the channels with a backstitch, (gosh it sounds so quick here. In reality it was like 6 months of jolly procrastination), then cut the cableties that were the bones to size (without hurting myself this time. When I made the Green Soprano Gown back in February I managed to take a chunk out of that bit between the thumb and index finger cutting cableties with blunt scissors. DON’T DO THAT.) and put them in the channels. Then I whipstitched the seam allowances down and joined the pieces together with a whipstitch as is the done thing. Then I covered them with brown linen and a spaced backstitch, cut the tabs, attached the shoulder straps and bound the edges with a bias binding that was sloppy as all hell because I suck at bias binding. Possibly also because I did it while working Theatre box office shifts, having to sit out front for 2.45 hours doing nothing while they did the Tempest. I was dog tired. Then I poked lacing holes (spaced for spiral lacing) with my dodgy-brothers awl (a really really sharp pencil followed by a size 5 metal knitting needle), and bound some very sloppy eyelets that look like wilty daisies. Then I lined it. Behold:
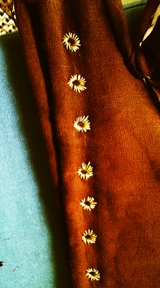
Functional wilty daisies.
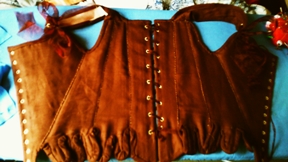
But also vaguely attractive. The maroon ribbon was a good choice, I feel.

Here they are with and sans petticoat. Dido hasn’t quite got as broad shoulders as I do, so the straps sit funny on her. But on me they’re vaguely indecent, so Dido’s what you’re getting.
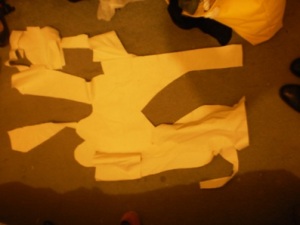
Stays done, and maximum uplift achieved, I could then pattern the robe. There’s also another great post, again from the Mantua Maker, about draping and constructing robes a l’Anglaise which was EXTREMELY helpful. It seemed like gibberish until I had the bits in front of me – much like pinching the laterals off tomato plants seemed unintelligible until I actually had tomato plants with laterals to pinch – and then it became crystal clear. Basically, I put my stays on Dido and draped the pattern over her. Sadly she’s…. just a little less squishy where it counts, let’s put it that way, so I made a toile first and then tried it on myself, and a little adjustment was necessary. It’s a really efficient way of patterning though, because you don’t have to true the seam lengths or do any geometry, as fun as that is. This was the pattern I ended up with:
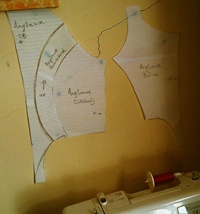
Complete with curved back seams. Hawt.
Then I cut out the fabric and lining (eek):
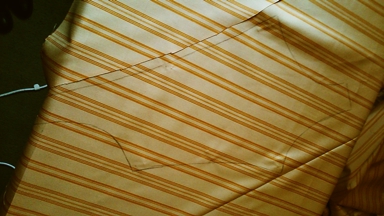
Yes, I’m aware stripes are scarier, and I’m not the best at stripe matching. I’m both an idiot and a sucker for a pretty stripe.
Then I basted the back panels together, wrong side to wrong side, seam allowances inwards, and sewed them together with a backstitch very close to the edges, leaving a little gap at top and bottom for turning in at the end. I used some twill tape to make boning cases for the CB. Then I did the same on the front, only sans twill tape. I finished the front edge with point a rabbatre sous le main, and then I pinned the front and back to my stays (on myself) and worked out the placement of the side seams from there. At this point I had a strange dream (well, strange for me. Most of my dreams are incredibly violent and involve using machine guns or Buffy-style kickboxing to fight either zombies or Voldemort. I kid you not. For me, a bloodless dream qualifies as strange) that I went to New Zealand for a costuming workshop run by Leimomi from the Dreamstress, and got loads of help fitting the robe, so she’s now the Dreamstress quite literally.
I found these tutorials from the Fashionable Past immensely helpful too, even though I wasn’t making mine en fourreau. She uses so many pictures and is so clear. It’s impossible to miss the point, really. I’m thinking if I’m crazy enough to attempt another of these, I’d make a jacket with an en fourreau back (I don’t even know if that’s really historically plausible, but hey.)
Then was the bit I was secretly excited about: the sleeves. I’m not great at modern sleeves, but I feel like the 18th century version had more room for adjustment, so I was interested to see how it panned out. I drafted a pattern, tried it on and adjusted it. This is what I ended up with (and then I closed out the dart because it ended up laying flat that way anyhow):
Sleevilicious.
And exactly as I anticipated, the 18th century method of sleeve setting in was easy, fun, quick, and generally awesome. This post from American Duchess made it very clear. Because Dido is as armless as a Greek statue, I did make sure to try them on pinned first, but there was relatively little wrestling required, and I even fluked some bonus stripe-matching. Here is my catalogue of stripe-match flukes:
Top-sleeve fluke-match.
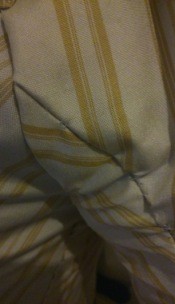
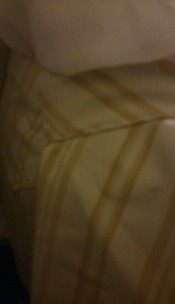
Two more flukes.
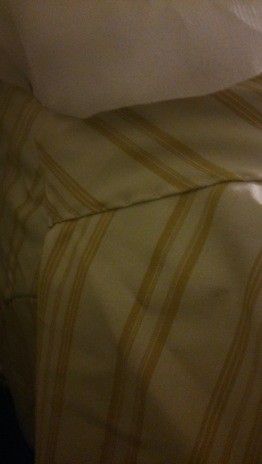
Yet more sleeve flukes.
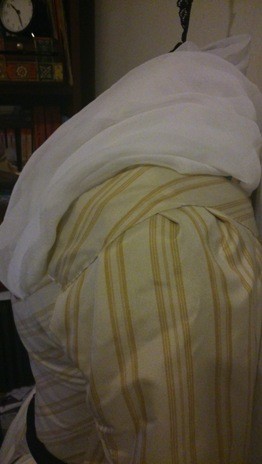
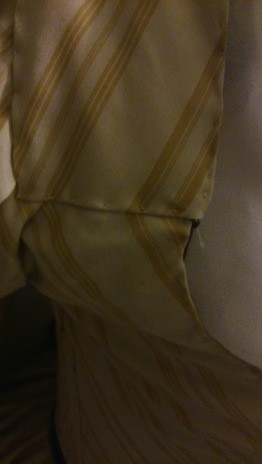
Here’s some of the damage the robe took when I kept trying to reach glasses on the top shelf in the kitchen. Stupid.
This stripe-match was deliberate.
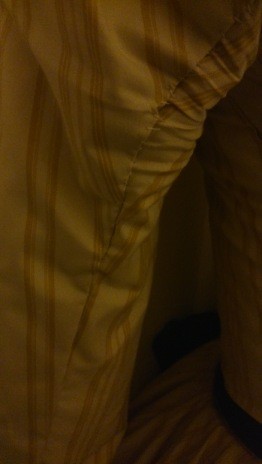
Also the last photo shows how I closed it with pins in the end. I had hooks and eyes, but they were stupidly fiddly getting dressed, and after ten minutes of struggling I caved and broke out the straight pins. Next time I’d do buttons maybe. Or just pin it again. Hell, here I go talking about next time again like it’s a thing.
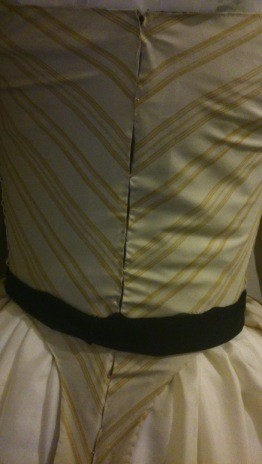
Then I attached the skirt. I know that’s meant to be the easy part, but I struggled. Next time I’ll do it differently. (Bad Belinda. Stop talking about next time. There is no next time.) I may even detach it and try again if I get massively bothered (no I won’t, what am I saying?) It was a big rectangle. Why are rectangles hard and yet sleeves are easy? I guess I shouldn’t be surprised. I am that crazy lady who can sing the Lied der Lulu standing on her head, yet would prefer to be disembowelled with a plastic spoon than sing Vedrai carino.
The petticoats were a different matter though. Nice and simple. There’s a tutorial from A Fashionable Frolick that had way more detail than I needed, not being any kind of re-enactor, but was also very straight-forward and made it a breeze. I made two. I was going to make three, but two seemed to cut the mustard, especially with the Alligator Bum underneath, and I didn’t have loads of time. The under-petticoat was a plain cotton that had loads of body, and was hand-sewn, the outer was of a soft off-white silk twill and was machined because I ran out of time. I also half-hand-sewed/half-machined a chemise, and didn’t bother to finish the neckline or hem (again because time). Then I didn’t bother to roll a hem on my fichu either. God I’m lazy.
So to summarise:
The corners I cut:
-I didn’t make pockets. I used a small drawstring bag I made when I was like, 13 tied onto my petticoat waistband. I started pockets but never finished them.
-I didn’t end up bothering with stockings. It was 28 degrees, and I was wearing an anachronistic pair of red patent clogs. Also, I found that my legs are so damn skinny that even with the garters tied below the knee as was the done thing, they fell down pretty much right away. What did skinny girls do back then when this happened? I’m curious.
-General lack of finishing/trims. I will trim it someday. I like it plain, but I feel it wants a row of pleated or ruched trim around the neck and sleeves.
-Various material inaccuracies. The chemise is cotton, not linen. Basically anywhere a linen thread would have been used, I used cotton because I’m cheap. The waist sash is unknown content synthetic that was in my stash. The structural layers of my stays are cotton calico rather than linen, and the ribbons are nylon rather than… whatever was used then. I’m pretty sure they didn’t use nylon.
-The mad machine rush to the finish line.
The things I would do differently:
-I’d try another method of attaching the skirt. I found that really tough.
-No hooks and eyes. They are the work of bealzebub.
-Shorter petties. Like, walking length. To show off my anachronistic clogs and keep them out of the damn way.
-The clumsiness of the tabs on my stays bugs me. I want them more tooth-y and less deflated-balloon-y.
What I liked:
-Silk thread is great. It’s like butter.
-Spaced backstitch is awesome.
-The period method of setting in sleeves is fabulous and I wish modern sleeves were as easy.
-Fishing around the blogs of awesome people for inspiration. You are all magnificent and wonderful. Particularly American Duchess, the Dreamstress, Before the Automobile, Temps d’élégance, The Fashionable Past, the Diary of a Mantua Maker, Dressed in Time, and Démodé. I am always inspired by what you do and in utter awe. Many a happy hour was spent procrastinating and not writing program notes for my recital.
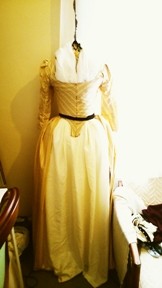

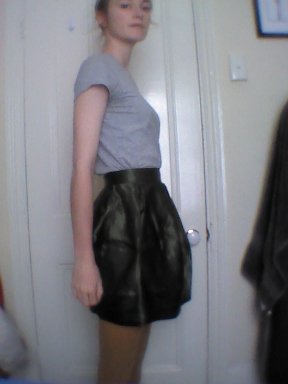
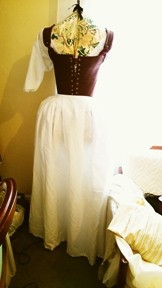
This is how it is now, on Dido. God I need to piece a wedge onto the back of the skirt….