Something Fishy About Them Florals

It should be a familiar story at this point.  I see a garment online/in a store/on Man Repeller.  It’s beautiful.  I want to be the sort of person who wears whatever that is.  But HOLY FUDGING SKIT-BALLS BATMAN IS THAT THE PRICE??!!  HAHAHAHAHA!  NOPE.  Cannot afford.  Nooooooo.

This time, the garment in question was a little sun-dress from The Reformation.  Now I am usually vehemently Not A Dress Person.  I often have places to be via foot or bus or train with multiple bags of bricks to carry (you know how heavy bags sneakily make your dress ride up at the back until everyone on the train platform gets some accidental fan-service?).   I also hate being the person clutching their skirt with grim determination in a 24 knot gust, wishing they had more hands to hold the damn thing down.  The rest of the time I hate how I suddenly look 12, or I associate dresses with auditions and get jumpy, or they just feel… unfinished.  But this time…. ?  I don’t know.  Maybe it’s the slightly grungy insouciance with which they’ve styled their models?  Maybe it’s the fact that they were wearing white Converses and I too (I know, surprising!) own a (very scuffed) pair of (used to be) white Converses.  Maybe it’s how El Niño took so long to bugger off that Sydney was still 20+ degrees in the middle of freaking May. Maybe I’ve been watching too much anime and have been coming to terms with the fact that looking cute is, well, cute.  Whatever it was, a cute little mini-sundress suddenly looked a lot more appealing than its ilk has in years.

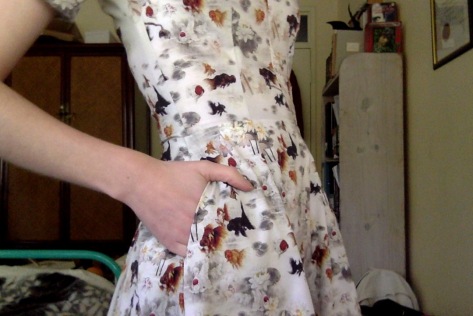
Sadly I can’t say my take on it is as environmentally sound as The Reformation’s.  My fabric is a synthetic (viscose/rayon, I think?) from Darn Cheap Fabrics which created God-knows-how-much carbon dioxide and waste water (and also I’ve heard rayon’s very bad for you long-term), but they let you order online now and they often have a good range of unusual prints.  I know.  Synthetic.  I hate it.  But it’s the only way I’m not going to be precious about it and actually wear it in casual situations. The best thing about it is the print.  It looks like a floral from a distance, but get up close and:

Photo on 26-05-2016 at 2.36 PM #5

THEY AREN’T FLOWERS AT ALL! (APART FROM THE BITS THAT ARE)  THEY’RE GOLDFISH!

So down to the nitty.  While I wanted my dress to look close to the original, there were also a few things I wanted to change.

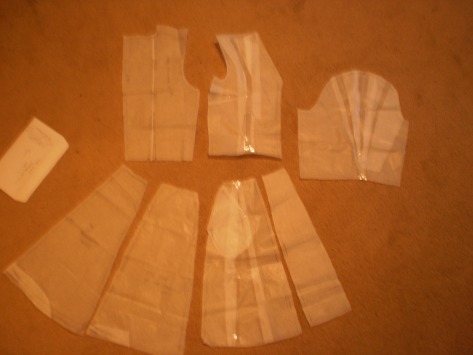
  1. I wanted a slightly more flared skirt because a true quarter circle skirt (as I suspect theirs is close to, just cut in panels) ends up needing shaping to fit both my hips and my waist, and I’d rather flare the skirt more than have to shape it at the top.  I ended up taking the pattern from the horsey mini and adding flare.
  2.  Pockets.  One of the things I hate about dresses is automatically going to hook your hand into a pocket and then realising with great sadness, after pawing in at the side of your hip for five minutes, that there are no pockets.  And then where do you put your hands?  Because it’s awkward now. You fold your arms.  You unfold them.  You put your hands on your hips, but that’s wrong too. Pretty soon you’d give your kingdom for a pocket.

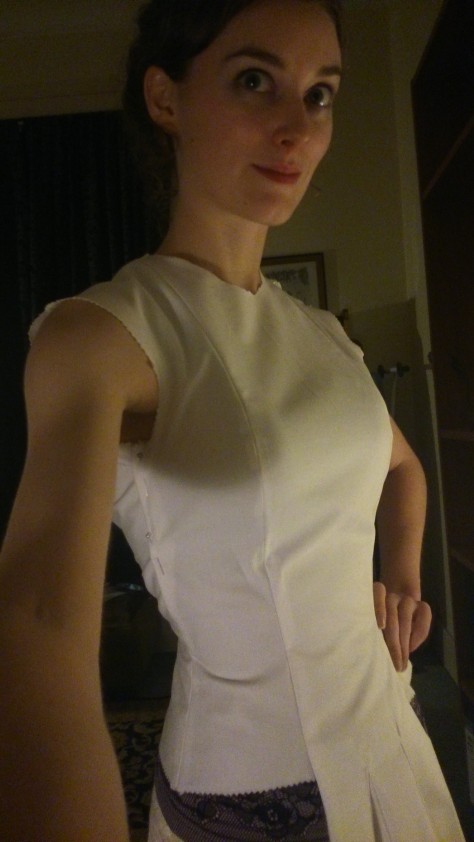
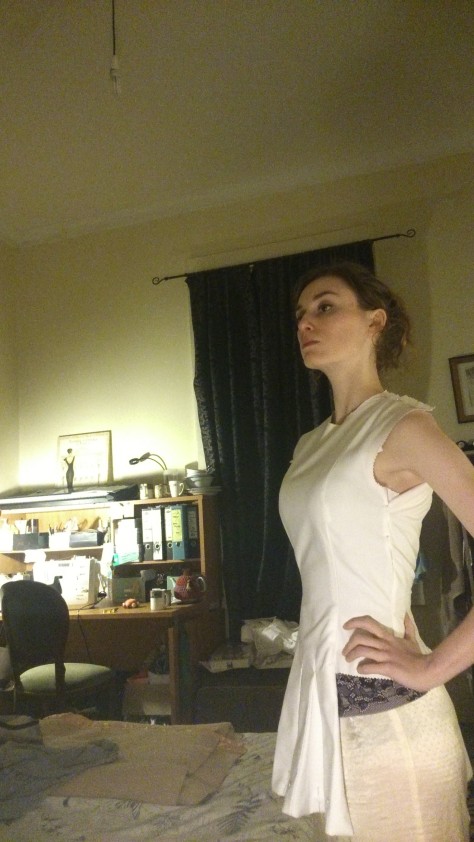
Mostly it was trouble-free to pattern and put together.  Apart from the bit where I need to re-do the back of my bodice block because it’s always a bit tight across the shoulders, and in my attempt to correct this on the fly I introduced about 2cm too much excess fullness across the bust which needed to be taken out at the end.  Fortunately I’d included a CF seam, and strangely enough my shape likes a bit of CF seam shaping.  The sleeves were a total fluke, patterned from my French sleeve block, but again with extra fullness added into the top on the fly.  The innards are all finished with pinking shears, because this stuff doesn’t seem to fray easily (win!).

OLYMPUS DIGITAL CAMERA

I apologise for the blurriness of that photo.  I dropped my phone shortly after I took the other photos and the camera is no longer what it was.  But you can see all the adjustments I ended up making to the basic pattern in all the taped-in bits of tissue paper, as well as the tiny fold I ended up taking out of the back because I still can’t seem to get the fit right. Damn my prominent shoulder-blades.

And next up in What Strange Hemming Method Will She Try Now? is tying 18th Century costume garters around your legs and pinning your hem to match them.  I didn’t take a photo because I was too frustrated at the time.  The manga-stack method I used for my PANTS gets a bit unwieldily once you get above the knee.

Then it was just stick-an-invisible-zip-in-the-back time, and done!

Photo on 26-05-2016 at 2.38 PM #2

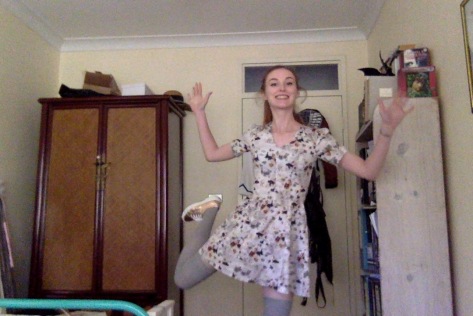
And behold!  It pairs well with gold Supergas and over-the-knee socks in my opinion.  And stupid poses.Photo on 26-05-2016 at 2.37 PM

The setting of the zip could be better, but I only have a normal zipper foot, so all things considered it’s pretty good.  You can’t tell in a blurry photo anyway so why am I even telling you?  Geez Belinda, shut up!

Photo on 26-05-2016 at 2.36 PM #6

And tbh who even cares about zip setting when there are pockets and goldfish, and the fit is good.  Honestly I put on a RTW skirt this morning and almost died at how appallingly it fit, so I think next up will be making some more skirts.  Maybe.  You know how scatty I am.

Robe a la Revamp

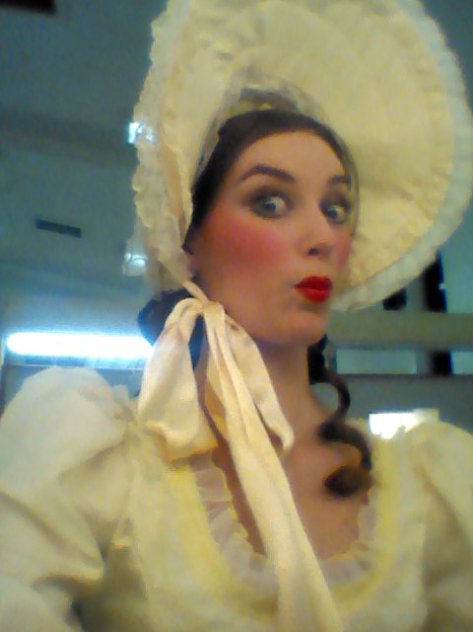
The robe a l’Anglaise strikes again.  One of my housemates loves costume parties, and decided to have a 1980s movie themed birthday party.  I was feeling lazy and didn’t want to make a whole new costume, so I decided it was a good opportunity to fix up the robe a l’Anglaise (shh.  Amadeus was made in the 1980s.  Terrible, terrible costumes.  But shh.  This totally counts).  I was never really happy with the skirt the first time, and it needed a bit of trim, which I’d mostly done earlier, but needed an excuse to finish.

2014-07-16 15.51.50

The trim was just strips cut out with pinking shears and then pleated prickstitched to the sleeves and neckline.  I only had one cuff left to do, so that was easy.  It was pretty crumpled from being in the bottom of the sewing chest for so long though, so I steamed it as well, using a pair of chopsticks to zhoosh it out while I was steaming.  Don’t hurt yourself with steam, kids.

I was kind of dreading re-doing the skirt in a faint pit-of-the-stomach, this-should-be-easy-but-god-I-hate-it way that’s normally reserved for filing my tax return.  The original problems were that it wasn’t long enough at the back, and the pleating was meh.

DSC_0178

You can see a good 6 inches of petticoat at the back in that picture.

Weirdly enough, the solution wasn’t that hard.  The skirt had been made of two rectangles sewn together selvage to selvage originally, but I HAD left them longer at the back… I’d just been a dill and sewn the wrong selvages together.  The short ones.  The ones that were meant to go at the front edges. So I took it off the bodice, unpicked the CB seam and re-did it on the right edges.  Problem solved.

I then decided that seeing I’d been such a grownup and done my tax properly the last couple of years, how hard could re-attaching the skirt properly be?  I just needed to approach it with a strategy for a change.

The strategy, for all ye who struggle attaching skirts to quarterback-style Anglaises is that I measured how far around the bodice I wanted it to go, then measured that length on the ironing board, putting pins at the ends and at the half and quarter-way marks.  Then I divided the skirt in halves and quarters and pinned it to the ironing board where the marker pins were.  Then I knife-pleated it until it fit and basted the pleats in place.  Then I just backstitched it to the bottom edge of the bodice.  The back point isn’t as pointy as last time, but the whole thing just sits better.

Finished product:

13054844_10153538275895592_330106693_o

Who’s your favourite 18th century babe?

Also, behold my mad hedgehog skillz!  It partially works because my hair is very layered at the moment, but also because period curling techniques work really really well.  And all you need is some tissue paper and a hair straightener.  I didn’t even use curling product this time and it still worked.  Then brush it out with a bristle brush, tease the crapola out of all of it except the long curls at the bottom, hairspray till you can’t breathe, and boom, you have a hedgehog.

I don’t think I’ll be wearing this dress again though, unless I let it out a bit.  I’ve gained some muscle in my new job.  Not much, but enough that I should be wearing the stays looser, but the l’Anglaise doesn’t close unless they’re done up all the way.  So it wasn’t very comfy, and on top of the fact that I was super tired already and loathe late nights, I spent half the party napping on a chair in the corner.

13090641_10153538213405592_2094953209_o

Who’s the life of the party?  Not me.

PANTS

Sure, I’ve been doing a bit of sewing over the summer and never got around to blogging about any of it.  So what’s dragged me out of the non-blogging stupor?

PANTS.  In capital letters because they’re not just pants, they’re PANTS.  HUGE PANTS.

Long story short, I finally got around to drafting a pants pattern just before I moved out of the share house in Melbourne, and I tested it by making a pair of shorts for me (which are ok but not mind-blowing), and a pair of pyjama shorts for my sister, which have the best stripe matching since the beginning of time.  Which sadly I can’t show you, because I can’t for the life of me find the photo.  You’ll just have to believe me.  The stripe-matching was mind-blowing.  EVERY SEAM.  EVERY STRIPE.

Photo on 9-04-2016 at 1.27 PMForgive these shorts for they are not ironed. 

The main flaw in the more boring, less stripy test-pants was that the proportions are off by a smidge.  So they’re kind of tight in the hips but saggy in the butt.  I think this is because the standard figure for which the block is meant to be is more of a usual shape with a more pronounced butt and less pronounced hips, whereas I don’t really have a butt, but I’ve got hips for days.

Then I moved up to my parent’s for a month, and I made another pair of shorts (or short culottes really), which again aren’t mind-blowing, but I was working with remnant fabric so I didn’t exactly have room to play around a lot.  I also sewed my first fly-front, using mostly this tutorial, and it was vastly easier than I expected.

Photo on 9-04-2016 at 1.26 PMSlightly disappointed by those shorts (though now I have no idea why because they’re actually super cute), I then made a shirt out of super-gauzy grey checked cotton with a pussy-bow instead of a collar, because by this point I’m just enjoying farting around with the shirt pattern and seeing how far I can push it.

DSC_1691

How much bow is too much?  Am I bowverdoing it? Geddit? … ?

After that I started working at OA for the schools company, and I’ve pretty much lived in activewear for the past two or three months, and had very little reason to sew anything.

But then I saw a pair of pants in COS, and they were green wool, high-waisted and super wide-leg, like palazzo pants and flares went and had a baby together.  These weren’t pants, they were PANTS.  And even though I didn’t think I needed giant pants before, suddenly there was a gaping hole in my wardrobe that only PANTS could fill.  They’d be Going Out PANTS, Family Occasion PANTS, even maybe Audition PANTS in the right circumstances.  They’d magically look put-together and insouciant at the same time.   They’d trick people into thinking they were a skirt and then BAM I’d take a stride and they would shockingly reveal that they are actually PANTS.  They’d be massively comfy and make up for the fact that I’d probably only want to wear them with stilettos.

But they didn’t have them in my size anywhere.

So I got my pants block, went through the motions of adjusting it for extra fullness as suggested in the Fashion Supplement at the back of More Dress Pattern Designing, and then slashed up to the darts, closed them off and taped in a heap of extra fullness at the bottom.  I won’t deny that looking at the pattern freaked me out a bit.  They could so easily turn into Circus PANTS, which I didn’t want.  Especially seeing the soft wool twill I got was a bit expensive, and they were going to use A LOT of it.

OLYMPUS DIGITAL CAMERA

As in really A LOT of it.

But they went together really easily.  I just used pinking shears so I didn’t have to finish anything, I popped in a side zip and then I hemmed them using a method called Stack Two Books on the Floor and Try and Pin the Hem Up So It Sits Level With the Top of the Books While Checking in the Mirror and Then Swear A Lot When It’s Fiddly and Time Consuming and I Wish Emily Was Here to Help Me But Now We Live Interstate and URGH.

OLYMPUS DIGITAL CAMERA

Manga isn’t just entertaining, it’s useful.

The hem itself was originally going to be a micro-hem, but then I decided a folded-up-twice hem would make it sit better.

OLYMPUS DIGITAL CAMERA

Surprisingly neat, all things considered.

And now I have PANTS.

Photo on 9-04-2016 at 1.20 PM

They’re stealthy.  You think they’re a skirt, but no!

Photo on 9-04-2016 at 1.22 PM

They are in fact PANTS!

Photo on 9-04-2016 at 1.24 PMWhat’s huge and dark green and coming to get you?  PANTS

I highly recommend them.  Make yourself some PANTS.


Naughty (Thigh High Boots) and Nice (Sproglet-Approved Dragon Plushie)

Naughty first because it’s just a triumphant update:  I FINISHED THE SATSUKI COSPLAY BOOTS!!!  They’re a bit baggy, but they’re my first real proper try (the Attack on Titan ones were just boot covers so they don’t count).  Glued to a pair of high heels and everything.  I’m moving this week though, so I’ll post about them properly later, and for now you can have a photo:

DSC_1602 DSC_1594

Now for nice.  I promised I’d post about the new dragon plushie dragon I made for my friend’s child, especially seeing I never posted about the first one.  It was small and green and made of felt, which was a nightmare to turn right-side out.

DSC_0760

Damn cute though.

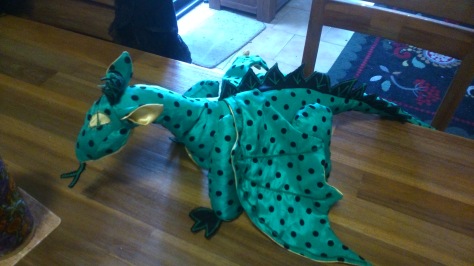
This time I thought I would be clever and make it out of green polyester taffeta with spots on, which would be easier to turn.  On second thoughts I decided to make it twice the size of the previous plushie as well.  Was it any easier?  …Eh?… Kind of?  My advice is not to do this the day before you want to give the plushie to the kid.  Or you’ll be up till *@#$ o’clock in the morning (even though that didn’t matter so much when I saw his happy little face).

DSC_1559

Should you wish to make one of your own, you will require:

-A couple of big sheets of paper (A3 would work well) to draw out your pattern.

-Some measuring tools, ie a tape and a ruler.  If you want to get fancy and get a compass too, by all means do, but I didn’t and I survived.

-About 50-75cm of fabric in the dragon’s main hide shade and about 25cm for the belly, feet, inside the ears and under the chin.  I used polyester taffeta and satin to make for easier lunch-stain-removal.  If you’re giving this plushie to a kid, it’s inevitable that at some point it’ll encounter tomato sauce or hummus or chocolate or all of the above.

-Some offcuts of a stiff fabric like cotton twill or felt (recommended, would have been easier) for the various features like horns, spines, a forked tongue or claws.  Go nuts.  If you want to do button eyes instead of appliqué eyes, you’ll need some of those too.

-Some felt to underline the belly to make it hold its shape better (not compulsory).

Step 1) Nut out a pattern

I broke the dragon down into the following parts:

dragon

  • The back, including the neck and tail (two identical halves).  Once it’s drawn, add a small dart to the place where the neck meets the back in order to round it out more.  Making the neck curve like so at the edge where you set in the head (which for clarity’s sake I will refer to as n) will give the head a charming downward tilt.
  • The belly (one part, cut on the fold).  Make this a half-football shape.  Measure the curved edge and make sure it isn’t too long for the lower edge of the back.  You don’t want it going too far into the tail.
  • The foot base.  This is a circle.  It will be the base of all the feet.  Measure the radius and work out the circumference (2πr thankyou highschool maths).  We’ll call this c.
  • The front leg (cut in two identical halves).  Start by getting your measuring tape, marking half c on it, then bending it slightly to get a shallow curve.  Trace this curve.  This is the bottom of the leg where you will set in the foot base.  After that, you can draw whatever leg shape you like above it.  Trace that base line on another piece of paper though so you’ve got a matching one to build the back leg off.
  • The back leg.  Start with the tracing of the front leg base and then draw another leg shape.  I made mine fatter and with a slight bend for the dragon’s knee.
  • The top of the head (which is cut on the fold).  This is where it gets kind of tricky.  What you want to do first is measure with your measuring tape.  This is what you have to work with re: the edges of the head that attach to the neck.  The top of the head is most important.  Allocate about 2/5 of n for it.  We’ll call that edge h. Draw as a straight line (because that’s easier).  Then measure about 5mm above h and draw a straight line for the fold edge from there.  You’ll end up with this:  Then what you want to do is decide how long your dragon’s head should be and add in some curves to complete the shape.  That 5mm from before will come out as a dart to differentiate the forehead from the neck a bit more and give you a guide for where the eyes go.  Now measure the bottom edge of the pattern piece and write it down.  I’ll call that edge b
  • The chin (cut in two identical halves).  I learned the hard way that it’ll be better to have  some kind of centre seam in the head somewhere, and the chin works.  It can be a straight seam.  Allocate about 1/3 of n for the neck-edge of the chin (let’s call it c).  Make c a straight line, then remember that measurement that you took before?  That is how long the top edge of the chin piece will be.  We will call it b2, using all the powers of our imaginations.
  • The cheek (for extra head-shaping) also has an edge that is whatever is left over of n.  We’ll call that edge k.  It doesn’t matter how long the cheek is so long as it’s the same length on both sides and so long as it’s shorter than b.  We’ll call the upper and lower sides of the cheek e.  They’re the same so I figure they’re interchangeable.
  • The eye, if you want to appliqué, however big you want
  • The wing, as you like.
  • The ear, in a vaguely star-trek logo shape is nice, but really you can do it however you like.
  • Misc other features like spines, toes, tongues etc can be up to you.

Still with me?  Have a picture of the bottom of the dragon.

DSC_1561

Step 2) Cut out your fabric

I chose to do the body, top of the head, cheek, legs and upper wings and ears in green, the belly, chin and under wings, feet and inner ears in yellow and the spines in black.  You do you though.

Step 3) Start your engines  (I’m so sorry I didn’t take any photos…)

I started with the details so I wouldn’t forget any.  I sewed the wings right-side to right-side around the edges, clipped the corners, turned them the right way out and sewed veins onto them in a zig-zag stitch.  Then I decorated the spines, belly and tongue with a zig-zag stitch in green.  I also sewed the dart in the back of the body pieces.

Then you can get down to business.

Pin the body pieces together along the spine with any spine details and wings sandwiched between.  Sew that seam down to the end of the tail and a little way back along the other side of the tail.  Clip the end of the tail and turn it the right way out.

Sew each leg together right-to-right leaving about an inch gap along the top back.  Very carefully baste the foot base pieces in to the ends and sew them in.  If you’re adding toes, do this in the same seam.  It’s fiddly.  Then clip the seam allowances and turn the legs the right way out.  Stuff them firmly (I used cut-up fabric scraps, but you could use commercial stuffing or lentils or whatever), then slip-stitch the gap at the top firmly closed.

Get the head-pieces ready to go on the body.  Sew k to right-to-right with the wide end of the cheek piece level with on both sides of the top head piece.  Then add on each side of the chin, with the edge of the cheek pieces level with c.  Then you can add eyes to the dragon however you wish.  I just appliquéd mine on with a zig-zag stitch.  I also added a forked tongue.

Now sew up the ears (if you want them) and more spines (if you want them) and baste them to the top of n on the body pieces.  Baste or pin the complete head on over the top, right-to-right, ensuring that the centre chin edges are level with the bottom of the neck.  Too long is better than too short, and if the head edges are too long you can just pleat the cheeks a little to bring them level and it’ll give the dragon a slightly chipmunky appearance.  Sew this seam, then turn it all the right way out and check that you’ve caught all the bottoms of the ears and spines.

Turn the whole thing inside out.  Carefully fold the wings up and baste them so they won’t get caught when you sew the belly seam.  Starting at the chin, sew straight down the centre seam of the dragon, attaching the belly to the other side of the body, and then stop at the end of the belly.  From the other side, sew the bottom tail seam up, leaving about a two inch gap so you can turn the whole thing the right way out.

Turn it the right way out (it will be frustrating).  Check that everything’s ok and you haven’t sewn the wings into the belly, and then you can stuff the whole body and slip-stitch the gap closed.  Then I added the legs.  A curved needle would have been useful here, but I didn’t have one and I managed.

Step 4) Give it to a kid

This is the fun part.  The kid will hopefully hug the crap out of it and then start explaining to you that it’s actually a water dragon and it likes to cook with chocolate even though it can’t eat chocolate because dragons eat meat.  (This is legitimately what happened).

DSC_1560

The kid hopefully won’t care that the spine’s wonky.

See you after I move!  I need to post about some exciting things like SHORTS.  YES, I MADE SHORTS.  I’M SO PROUD I’M ONLY TALKING IN CAPITALS FROM NOW ON!  Stay (vaguely) tuned!


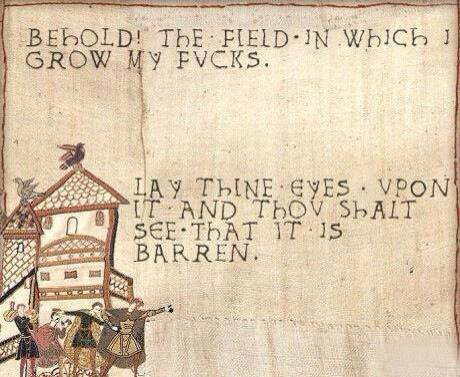
Behold the Field Where I Grow All The Things I Have Finished!

Lay thine eyes upon it and thou shalt see that it is full of finished things!

I’ve been super good recently and finished a bunch of things before I start other things.  Aren’t you proud of me?  So far I have:

Made a slightly rude cushion for a housewarming present.

Made another dragon plushie for my friend’s sproglet’s birthday.

Finished fixing the badges on my Attack on Titan jacket.

Finished that blue ruffly shirt even though my sewing machine reeeeally didn’t want to.

And I am a whole two steps closer to being finished the Junketsu!

But for now, allow me to focus on the rude cushion.  I’ll post about the other things another time. Everyone’s come across the Bayeux Tapestry memes, yes?field of fucks

A shining example of how gloriously pertinent a meme can be.

I have an aunt who had recently moved, and who I was sure would appreciate said meme.  I also found that embroidery hoops are surprisingly cheap.  So I got about a metre of canvas, a cushion insert, a zip, four tassels, a couple of skeins of embroidery cotton, and went for it.  First I drew up a square 35cm x 35cm to match the cushion insert, and then using a mechanical pencil I copied some selected design elements directly onto the canvas.  I figured I was sewing over the pencil anyhow.  I chose the little man in the pale kirtle (is that a kirtle?)in the foreground, and the words, because I didn’t want to get in too far over my head.

I used backstitch for the words and outlines, and satin stitch (without the outlining or padstitching) for the fill colours on the little dude.  The dots and full stops were done with a french knot (I didn’t bother swapping needles).

DSC_1538

The little dude with the field.

When I was done with the embroidery, I put the cushion together using the Dreamstress’s foolproof tutorial.  I lightly basted the tassels into the corners before I sewed the front and back of the cushion together.  All in all, a surprisingly fun thing to make (especially seeing embroidery combines well with sitting up in bed and watching an entire season of Nisekoi).  And much appreciated.

DSC_1575

Pre-sewing

DSC_1578

Post-sewing up, with tassels.

I apologise for the poor lighting in that photo.  The light in my room’s been broken forever and seeing I’m moving in about a month, it’ll be easier to install a new one when the room is devoid of furniture.

Stay tuned for a lightning-quick dodgy guide to how to make the most darn-tootin’ adorable, 100% sproglet-approved dragon plushie, which I promise I will upload soon and not in like a year.

Opera and Cosplay Duke it Out

When I last posted I had this vision that a heap of things were going to be done by now.  I was going to be finished the Junketsu and I was going to have worn it triumphantly at PAX.  I was going to be churning out shirts and skirts and things for summer.  I was going to have finished all the performance dresses that I stupidly started right before comps and concerts.  Hell, at one point I even thought I would make a gown.

Haha, NOPE.  It’s a crazy story.

So I entered the New Zealand Aria the night before entries closed.  Then I realised that it was on at the same time as PAX so there was no point finishing the Junketsu (wrong, but we’ll get to that in a minute).  Then I cut out two Man Repeller-inspired ruffled shirts for My Wardrobe S/S 16, but sewing the pleather for my Attack on Titan cosplay had killed the tension wheel on my Janome and it went off to be serviced.  Two weeks of waiting for it to come back and consoling myself with fan art later…

Kyojin_Con

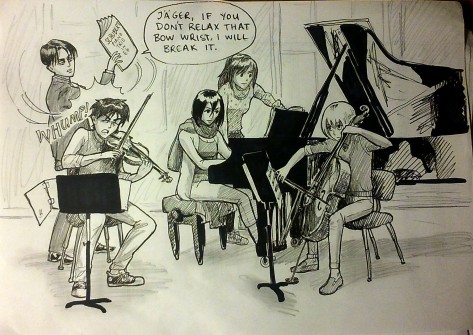
I tend to only ship characters with musical instruments.

…I should have done all the finishing on the fuchsia performance dress then, but stupidly I chose to binge on Noragami instead.  Then I did an audition for Opera Australia in Sydney.  Then I got a callback, so I had to cancel on New Zealand SO THE MORAL OF THAT STORY IS IF I’D JUST FINISHED THE DAMN JUNKETSU I COULD HAVE GONE TO PAX ANYWAY.  I was sad and happy and confused so then I entered the Diamond Valley Eisteddfod (again the night before the damn thing.  Noticing a pattern?). I hand-hemmed the fuchsia dress at the venue on the day, and then I won the aria section.  Then I found out I had the job with OA.  Then I didn’t sleep for about 48 hours.  Now I’m doing weird random procrastinatey sewing things instead of finishing the summer clothes that I know I’ll need up north.

Like how I suddenly decided that the arm and pocket badges on my AoT jacket look wrong and need to be fixed.  The method I’m  using now (just appliqueing on a big general wing-shaped cut-out and then zig-zagging the lines on over the top) is a lot quicker and easier than the first method I used, and I think it reads better too.

DSC_1540

DSC_1541

Way better, right?

I’ve started on one of the summer shirts, but I’m currently baulking at the buttonholes because my machine is still a bit hit-and-miss with buttonholes.  It’s just the frumpster shirt pattern with the sleeves cut in further, and a ruffle on a strip of bias binding added over the top.

DSC_1543

If it looks like it’s spent the week scrunched up in a corner, that’s because it has.

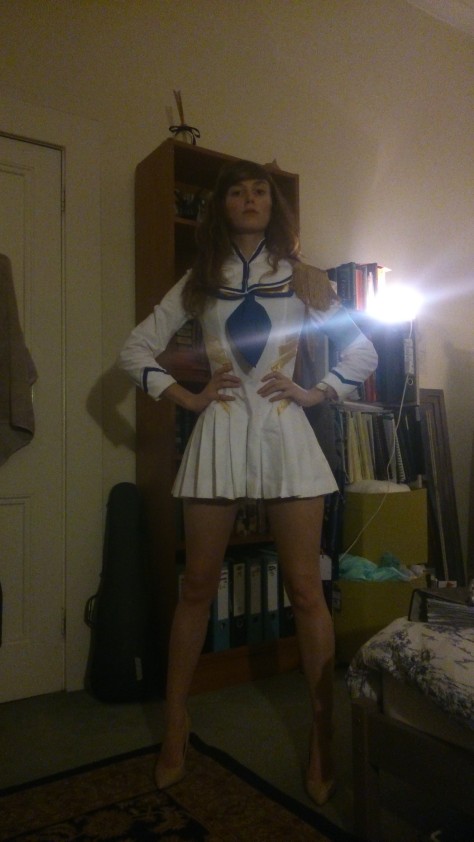
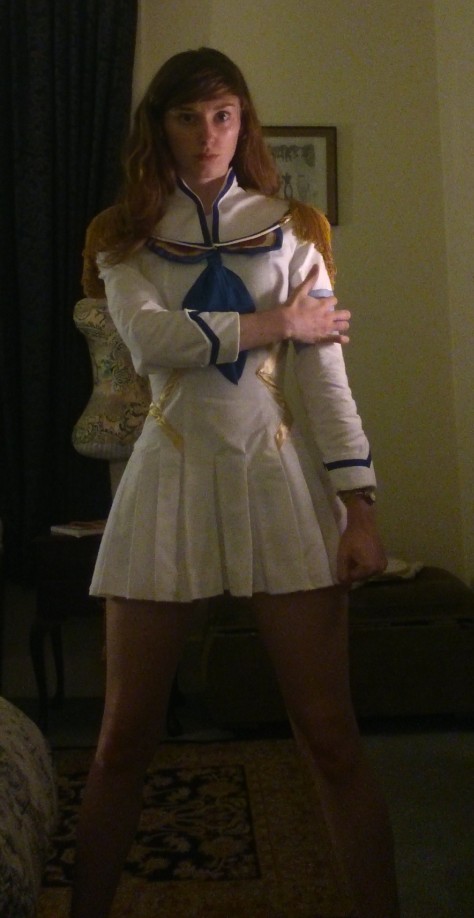
The Junketsu has now been hemmed.  Behold it in its shortness if you dare, along with my best attempt at a faux-fringe (which really just ended up looking kind of vintage.  Oh well.  Satsuki’s kind of a pin-up anyway).  I ordered a wig online yesterday, taking my chances with a random cosplay wig shop on AliExpress.  The shipping times are so variable that I just put in the address as my parent’s place in case it takes a month and I’ve moved out of the sharehouse, so Mum, if you get a very long blue wig in the post please don’t get a shock.

DSC_1528

As if getting a wig in the post could be any more shocking than the length of that skirt.

I have decided I’ll attach the sailor collar with snaps, but the ones I have in my stash are tiny, so I’ll zip out to somewhere and get bigger ones.  I’ve glued  I-don’t-know-what-you-call-thems on the boards.  They’re the bits that you pass epaulettes through to button the boards on.

DSC_1542

They don’t look very nice because I glued them on and used Fray-Block to finish the edges.

I will add epaulettes to the Junketsu and then the boards can button or snap on.  I was worried that the boards were too big, but even just pinned on they look really good.  The scarf tie things are another story though.  I’ll take them off and make them smaller and pointier.

DSC_1534

With both boards in dynamic pre-transformation pose

I’ve also ordered the white stretch-PVC for the boots, and I’ll put them together on my friend’s serger, because I really don’t want to be servicing my poor old machine twice in as many months, and comparing my sewing machine to Sergei the serger is like comparing an elderly lady who’s still ok walking the dog with some kind of super hardcore Russian SAS person with muscles on their muscles.  Then I’ll get a pair of op-shop heels and glue them over the top.  The PVC was a bit expensive, but there’s really only one place in Australia that had it and I only need a metre for my scrawny pins so it’s not that bad.

Then the only thing will be the sword, Bankuze.  It’s basically a big white katana with a fancy cross-bar (no idea what you call that part on a katana, and behold my apparent inability to google it).  The internet has many which are expensive, not super great-looking and of dubious customs-passability.  I’m contemplating how hard it would be to make a passable Bankuze-like-object out of cardboard or papier mache or plastic or something.  Satsuki doesn’t even usually bother to unsheathe it unless she’s fighting Ryuko anyhow.


Attack on Cosplay Part Two – The Thousand and One Infuriating Straps

I’m not gonna lie, I would seriously rather hand-sew another set of 18th Century stays than make another Attack on Titan harness.  True, the stays took me like 8 months longer, but they didn’t involve trying to make my craptacular Janome come to terms with pleather.

Internet research confirmed that pleather is a special snowflake, and because it’s both stretchy and sticky, it needs extra help to go under the presser-foot without bunching and puckering.   Some recommended a roller foot (sounds awesome but couldn’t get one), or the ol’ paper trick, where you pin paper over the fabric and rip it off after.  Others recommended a teflon foot, which I got, as my local Janome dealer didn’t have a roller foot.  The poor shop lady looked at me with plain distress on her face when I said ‘cosplay’ and ‘pleather’ in the same sentence.  Sadly, when I got the foot home it only kind of vaguely worked, more on that later. Pleather’s other extra-special attribute is that it doesn’t like pins, because it’s not woven and pins will leave holes.

But this is me we’re talking about, and I like leaping in at the deep end without checking for pointy rocks/stingrays/Cthulu first.  I already felt I’d done enough planning by drawing up a ton of notes on what attaches where.  Bear in mind there are much MUCH better diagrams in google images, and even though I’d drawn these out, there was no guarantee I’d follow them perfectly in the moment.

DSC_1320 DSC_1322DSC_1321

Haha, even just reading those back now there are so many places where I deviated from the plan.  Because I am Captain By-The-Seat-of-My-Pants.

So first I just made oodles and oodles of strapping from the pleather, with the non-stretch direction lengthways. Turning a tube was too hard because the right sides stick to each other, so I folded an 8cm-wide strip in half, wrong side to wrong side, topstitched the fold, then folded in the other edge a cm or so and topstitched it too.  Because by that stage I hadn’t had a chance to haul my butt to Maribyrnong to get a teflon foot, I used the paper method, and because pleather dislikes pins, I used bobby pins.  It helps that because I have stubborn hair, I have extra-strong bobby pins.  BOBBY PINS ARE THE ANSWER TO EVERYTHING.  Also, if you are someone with Hermione-levels of hair like me, you probably already have loads of them lying around.  If you have short hair/love office products, I hear paperclips work too.

DSC_1201

Yes, that’s La Traviata.  It was in an old subject reader from my undergrad so it was an excerpt anyway.  I wasn’t sacrificing actual sheet music.  The paper rips very cleanly off in this instance because the pleather doesn’t try to come with it the way a knit fabric does.

After I’d made metres and metres of the stuff, I started with the back pad and made my way down from there, sometimes using Dido the dressform, but trying it on me every now and again because sometimes she goes a funny round-shouldered shape that’s not helpful.

The back pad (and both the scabbard pads, for that matter) were a cheap grey poplin underlined with felt leftover from a dragon plushie I made for a friend’s five-year-old a while back and forgot to blog about.  Problem is, this is the colour of the felt:

DSC_0760

Naw, how cute was it before it got loved to death?  Anyway, back to AoT.  Turns out when you underline grey poplin with green felt and then expect to cut what are effectively large buttonholes for straps to pass through, you inevitably see the green felt on the inside of the slash, like your harness is secretly Bruce Banner or something.  Not a massive problem, but weird up close.  And cartoon-prompting.

DSC_1342

DSC_1182

Have a very dark photo of the pattern, because I can’t be bothered lightening it.

Then it was a matter of trimming straps to size and adding them one at a time.  The upper back first, then the sternum buckle, then from there.  Somewhere along the line I realised it’d be easier to make the whole thing in one rather than trying to keep the top and bottom separate.  I’m sorry I didn’t take better notes as I went, but it was pretty damn confusing, the whole process lasted a couple of weeks and I’m not entirely sure I knew what I was doing at the time.  There was wine was involved at several points.  Also some pretending to be Levi, some pretending to be Veronica Lake, and some wearing the flower crown from when I was Woodsprite 1 in Rusalka earlier this year. Pro-tip, don’t drink and sew, and definitely don’t let a soprano have access to wine, cosplay and a camera at the same time.  Do have a montage though.

DSC_1193DSC_1194DSC_1206DSC_1208DSC_1210DSC_1220DSC_1212DSC_1260DSC_1240DSC_1229DSC_1230DSC_1255DSC_1290DSC_1268

By the end it was crazy trying to get the whole thing under the needle…

DSC_1221

And sometimes I resorted to some dumb tactics…

DSC_1222

Most of it was sewn together using a variant on this criss-cross pattern:

DSC_1329

Right up the top in that photo you can see what I mean about the green felt too.

Some of the details ended up being pretty crucial.  For example, I realised early on that it’d be silly to permanently attach any of the straps to the scabbard pads in a way that they couldn’t move.  So this is the arrangement I came up with on the back, using fabric loops.  The thigh straps just feed through enormous buttonholes the way the shoulder straps do in the shoulder pad:

DSC_1326

The buckles were just sewn on and the holes for the latchets were made with a stitch ripper because my awl (and by awl, I mean very sharp pencil) didn’t work.

DSC_1328

I didn’t end up attaching the straps at the front with buckles to the belt because I couldn’t really think of a way to do it, I ran out of buckles, and really I was just looping them around the belt loops of my jeans and using the belt (which is totally separate) to hold them down.

Here it is in its completed (if slightly dodgy) glory:

DSC_1323 DSC_1324

I tried taking a couple of videos of putting the whole catastrophe on to see if I could document it clearly, but it didn’t make it any clearer and it takes roughly ten minutes (I can see why humanity is dying out if it takes their strongest members that long to get their kit on and off, you know what I mean?), so make do with a talkthrough:

  1. Lay the catastrophe on the floor, front side up.  Make sure nothing is tangled (HA)
  2. Sit yourself down smack-bang in the middle.  Shimmy thy legs under the bit that will cross over just below your stomach in the end.
  3. Then get each leg down into the leg loops until your feet are at the bottom.  Make sure nothing’s twisted again.  If something is twisted, swear at it for a while until it goes away.
  4. Do up the thigh straps.  Adjust the crap out of all leg bits so that everything sits where it should.
  5. AWESOME FUN TIP: Put on some socks now!  It’ll keep the foot loops from leaping off your feet when you stand up, and stop them squeaking like you’re walking through a rubber ducky warehouse in stilettos when you put your boots on.  My socks have cats on them.
  6. Grab hold of the back pad over your shoulder and stand up.
  7. Squiggle all the straps up over your bum at the back.
  8. Pop your arms through the arm-holes at the top and shimmy the top half on without throwing your neck out.  If you can’t turn your head after, time to swear some more and then call the physio.  Make sure those straps aren’t twisted first though.  See earlier swearing comment.
  9. Do up the sternum strap.  If you are a boob-owner and need to move yours out of the way, do that now too.  If you just have massive pecs like Captain America I can offer you little advice except good on you for having them, and can you do that thing where they pop individually?  That’s hilarious.
  10. The ends of the straps that come from the back button on around the front ones (because I found if I sewed them down I couldn’t get my hips through it.  Your mileage may vary if yours don’t prompt strange older women to compliment you creepily on your physiological suitability for childbirth.)
  11. Now’s when I add the belt over the top.  I’m about to tell you about the skirt too. If you’re still reading that is. If you’re not then I guess I can call you a spleeny bat-fowling scut and you’ll be none the wiser. Thankyou Shakespearean Insult Generator…

The skirt thing was a lightly shaped arc thing with holes for the belt loops so I could still put the belt through them.  It tied on to the belt loops with little ribbons (aww).  It goes on after stage 10, and there are slits for the belt loops of the jeans to go through so that the belt can still be threaded through them.  Then the ribbons are tied on to whichever strap is closest.

DSC_1332 DSC_1333

It’s pretty hard to see in these photos.  Sorry.  The areas of shaping and the edges were folded over and topstitched, and this is where the teflon foot came (vaguely) in handy.  Vaguely because it was only a bit better than the metal foot, but on seams in the middle of a piece of pleather the paper method gets a whole lot harder.

The bit that really made sticking hot forks in one’s eyes sound like fun was the boot covers.  I loosely followed this boot cover tutorial, mostly because I didn’t want to have to destroy any of my shoes and I didn’t want to buy any new ones to cover.  First I was going to cover a set of riding boots that I can be seen wearing in most of the above photos, but the problem is I have scrawny wee calves, so the boots aren’t fitted.  So the first one looked completely wrong and the top flaps were more flops.  So I re-drafted them to go over a pair of ankle boots and then fit directly to the leg.  Much better from a fit perspective, but such a nightmare from a topstitching perspective.  And the teflon foot did a very half-arsed job. Then when I thought I was out of the woods, the top flaps were still disappointingly floppy (yes, I’m being dirty, you love it) because the pleather was quite soft, even after being interfaced with heavy linen.  So I went with my usual sewing panacea of using twill tape to create a bone casing and putting a cable tie in it.  That appeared to help.

DSC_1281

The other inaccuracy was that the cords on the AoT boots are brown.  But I had green rat tail left from when I butchered the green soprano gown (the gown as it was, and as it is now and ever shall be).  So I have green cords on my boots.  Shh.

DSC_1337

You can’t really tell, right?

DSC_1286

So that’s a wrap really!  I’ll make a cloak at some point to add to it, but I’ll wait for the perfect green wool so that it’ll be warm and rain-repellent and heavy and gorgeous. In the meantime, have some more pictures of me and my friend having fun outside the movies in our costumes!  I may have taken to photoshop and done a Who Framed Roger Rabbit on two of them… couldn’t resist.

2Hanges1

Two Hanges are better than one.

2Hanges5plus_grumpy_Levi

Levi’s kicking himself he picked the berry paddle-pop when he could have had dulce de leche but didn’t want to look like he was copying Hange 2.

2Hanges4_plus_scared_Eren

Eren’s wondering if the Hanges would catch him if he tried to escape.

OH!  And if you haven’t already done so, check out the Society 6 store I just got!  I do way more art than just photoshop characters into silly photos, and you can get it on a mug or a phone case.  It’s pretty awesome. 🙂

Attack on Cosplay – Jacket Potato (Sasha wishes…)

That Attack on Titan cosplay I hinted at in my last post is done.  Done and worn and everything. Though, if you know me on like any other form of social media you’ll already be sick of it, so if that’s you, I’m not going to be offended if you sit this one out.

If that’s not you (or if that’s you but you want to know how I made it/feel some weird obligation to read everything I thoughtlessly spew forth like some kind of projectile-vomiting random word generator), strap yourselves in.  It’s probably going to be a several-post ride.

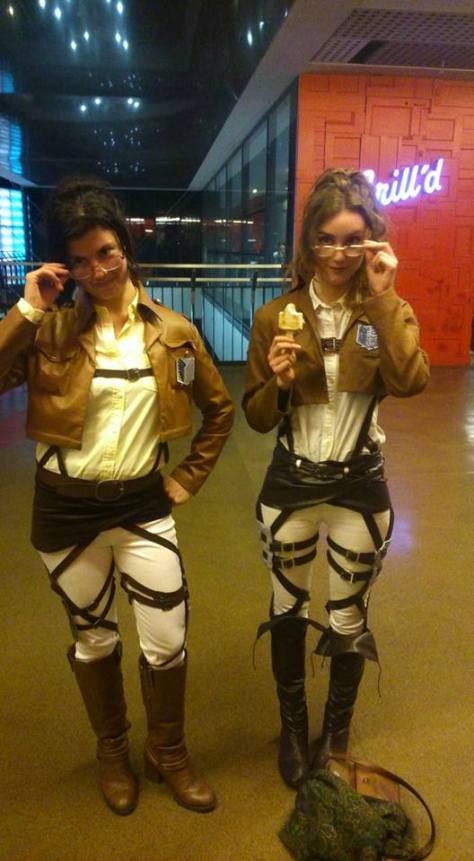
First, BEHOLD IT IN ITS FINISHED GLORY!

2Hanges1

Double the Hange = Double the chance Eren’s getting dissected today.

Now onto the iconic jacket, before I totally forget how I did it.  I didn’t take loads of photos because for once I really got into the flow of it and who has time for photos when they’re in the zone.  Eye of the tiger.

Stage The First: Draft It.  Draft It Good.

Step one (which probably isn’t all that helpful for anyone who’s not into this sort of technical crap) was go to my copy of Natalie Bray and nut out a jacket block from my standard bodice block pattern.  This took me longer than anticipated because my standard block is a helluva lot snugger than the one Natalie recommends, partly because it’s not 1968 and partly because I make a lot of dresses that need a no ease/negative ease block.  But it still didn’t take as long as I’d anticipated, so win.

DSC_1309

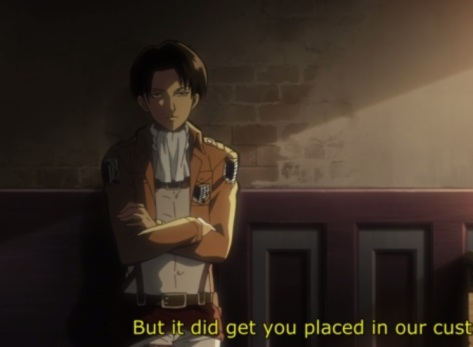
Then I found a picture of someone in a jacket standing nice and still in a well-lit place.

armin jacket

Extra helpful because Armin’s build is me without the hips, so I can see how the jacket should sit.

 Thanks, Armin, you’re a gem.  None of this lurking in the shadows business like other people we know but love anyway.

Untitled

“Shut up.  Sun-safety is almost as important as cleanliness.”

Then I wrote a giant sticky note of all the design elements and how they would relate to my pattern draft.   I stuck with a pretty simple pattern in the end – no shaping except a tiny bit at the side seams to stop it kicking out at the back, and a yoke seam to tidily hide a little shaping at the front.  It was mostly going to be hidden under the patch pockets anyhow, so I didn’t worry about the fact that no yoke seams are apparent in the anime or manga.  The sleeves are a slightly widened version of the sleeve from my shirt pattern, as I find it almost impossible to draft a sleeve based on my top-arm measurement (thanks, broad bony shoulders and skinny arms, so helpful).  The collar went through a couple of revisions, because in the first toile (yes, I know, I made one for a change), it was ridiculously small.  This was what I ended up with:

DSC_1310

DSC_1311

I’ve lost the toile and I didn’t take any pictures because I’m scatty like that.  It basically looked like the finished jacket, only without sleeves, and in some ghastly aqua poly-pop.

Step The Second: Hunt A Fabric

Fabric-wise, I originally wanted a lightweight wool because I thought it would a) be nice and b) be warm, but the Fabric Store had nada (they did have a nice brown pleather though, more on that later), the internet had zip and Spotlight had cotton duck in as close as I was ever going to find to the right colour.  If I ever, ever find wool in the right weight and colour, I would totally re-make the jacket because I think it would look damn spiffy in wool.  But alas, cotton it was.  In a slightly more burnt shade of caramel brown than what was required.

Step The Third: Sew For A Bit

So I set to work cutting it up and sewing the body of the jacket together, cut out the collar,  prepared the collar, and starched the hell out of the collar (seriously, starch is my favourite thing.  I went so overboard on the starch).  With the collar, because the cotton duck is heavy, I fiddled around with what’s called ‘turn of cloth allowance’ or ‘roll allowance’ (the blogger at that link also does an excellent collar-drafting tutorial, and pretty fabulous tutorials in general).

Step Four: Get Distracted (But Productively, I Swear)

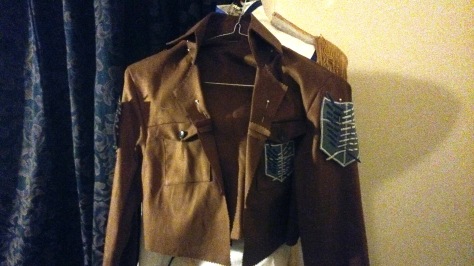
Then I got sidetracked making patches.  Because I was being silly frugal, I went with fabric scraps I had to hand.  I had some cotton jersey in a good blue-grey colour (from the sailor pants) so I underlined it with the cotton duck and then for the three smaller patches I just machine-zig-zagged the wings on in a vague, haphazard manner that makes them look more like the scribby ones from the manga as opposed to the neat tidy ones in the anime.  Still better than the muddy faded ones in the movie.

DSC_1139

Flügel der Ungleichmäßigkeit

For the larger back patch I appliqued on pieces of navy and white fabric.  I tried to find some offcuts from the Junketsu for the white bits, but failed, and used white cotton moleskin instead because it was there in the scrap-box, which in retrospect was a mistake because fluffies were everywhere.  The fluffies seem to come off after a while though, so maybe it’s not the end of the world.

DSC_1167

Then, dear readers, I made a classic rookie error.  I should have sewed all the patches and the epaulettes on now.  While the pocket and sleeves were still not sewn on to the jacket.  You see where I’m going.   But no, I was in the zone and getting ahead of myself and I was too excited researching how to line the damn thing about practical stuff like that.

Stage Five: Have Soprano Tantrum

The other reason that sewing the patches on the sleeves before attaching them would have helped is that it would have stopped me having the terrible time I had the night I ended up sewing on both sleeves on inside out and/or back to front.  Multiple times.  Having the patches as an obvious visual marker to say THIS IS THE RIGHT SIDE would have been amazeballs. Just goes to show, always make sure you have the right notches matched up, and don’t overthink what way is right-side-to-right-side.  The Road of Overthinking leads through the Vale of Eternal Stuffups.  On the way to the Gorge of Angry Soprano-Harpies.  I ended up putting it away and watching almost all of Glitch (HEARTILY RECOMMEND) to calm down, and then got the jacket back out of the Naughty Corner the next day and unpicking and re-sewing the sleeves.  I may have cried when I got them right.

Stage Six: Collar That Puppy

The collar went together exactly like a shirt collar.  Some people struggle with shirt collars, I hear.  I found the tutorial antidote to shirt collar struggles many moons ago at Male Pattern Boldness, as Peter is a gun at shirt collars.  This post and the couple that come after it show what good collar sewing is all about.  I’m too lazy to bother with interfacing, however, and just starched the crap out of my collar instead.

Then I sewed up my pocket flaps and attached them and the patch pockets, adding the buttons from my stash and buttonholes too.  And the epaulettes because I’d forgotten them earlier.  There was much weeping and palming of faces.  I’ve noticed that I also tend to forget the epaulettes whenever I draw cartoons involving AoT characters too, so I guess I’m just a little epaulette-blind.  If they’re not enormous and dripping with gold fringe, what’s the point of noticing them, right?

DSC_1168

Stage Seven: The Lining of the Beast

Then I dug some old navy acetate out of the stash, cut a facing from the brown duck and sewed up and added a lining.  I’m not even going to try to explain this.  It was my first go at lining a jacket anyhow.  So have a link to a tutorial.  This is the one I found most useful, but if you’re in the same situation I was for the love of Dog read the whole thing first before you go step-by-step.  I ended up having to rip out the most perfect bloody slip-stitches because I got ahead of myself.  This series of illustrations was also helpful.

Stage Eight: Glory in Thy Achievement

Put on Blue Steel like you’re God’s gift to the Survey Corps.

DSC_1169

Admire the way the uniform flatters your butt jacket hangs perfectly at the back.

DSC_1176

Give the salute with a cheezy expression of hope and determination.

DSC_1162

And stay tuned for the next instalment, Scheherazade and the Thousand and One VMD Harness Straps.

Back in the (Shirt/Cosplay) Game

I think I’m finally getting the hang of this whole sewing by machine thing (I know, it’s taken me long enough, right?). In all seriousness though, the past month and a bit has seen me get the hang of shirts.  Shirts!  That staple of my wardrobe that I never thought I’d master.  Now I see shirts in shop windows/on the internet/on actual people and, given I have the right fabric, buttons to hand and about 5 hours, I can make them mine for half or a third of the price.  It’s scarily addictive.

It’s also fun toying with the pattern I’m using (which is pretty frumpy), to see what different results I can get and what makes a shirt look fresh.

Stage one of the pattern-fernangling produced this:

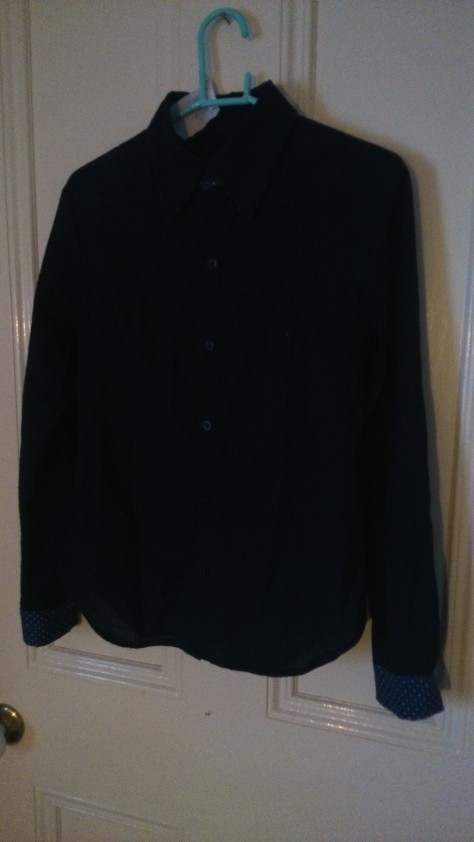
DSC_1093Ignore the wrinkles.

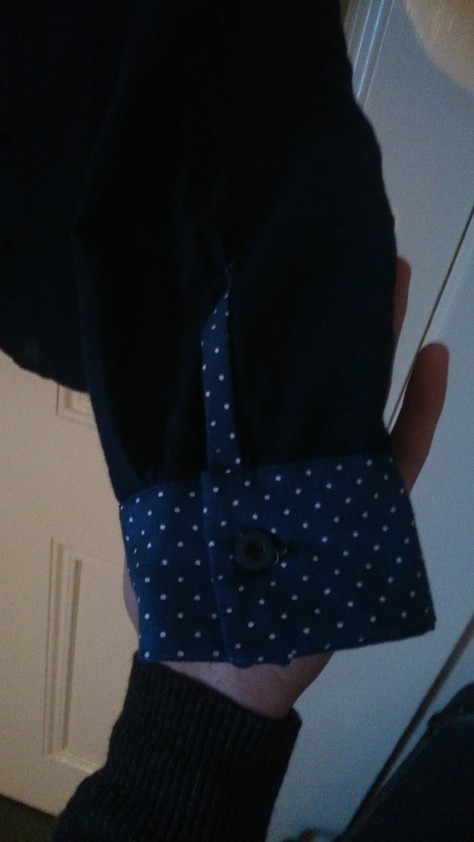
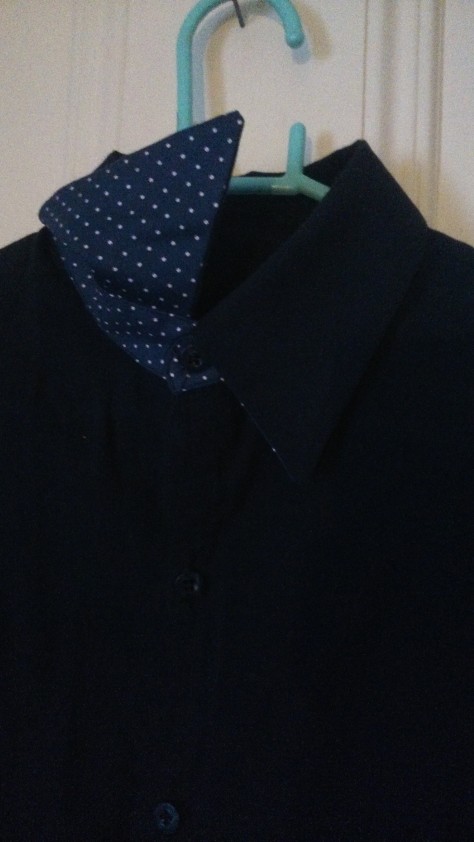
Ie: a navy cotton voile shirt (leftovers from the Bombshells dresses) with contrast cuffs and under collar.  I followed the pattern pretty closely.  I just removed the waist darts and shaved an edge off the cuffs so they weren’t all pointy.  All in all it’s not bad, but I still feel vaguely like a basic soccer mum when I wear it, which isn’t how I want to feel.  In retrospect the recommended distance between the buttons is too far, the collar shape’s still a bit off, curved side seams are stupid and the cuff slits shouldn’t be faced in a heavy fabric.  I’ve learned my lesson.

DSC_1094Not that you can really tell.  But I know.

DSC_1095

Business on top, party underneath.

Using a heavier fabric for the undercollar and outer collar stand was a good plan though, because screw interfacing.

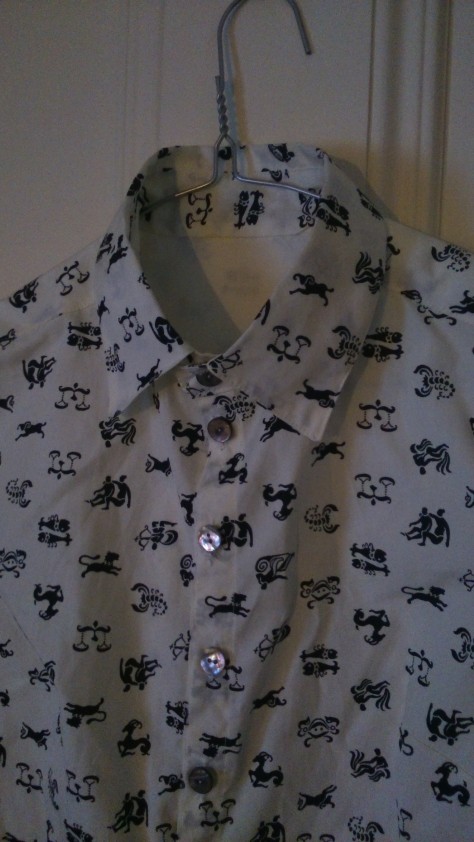
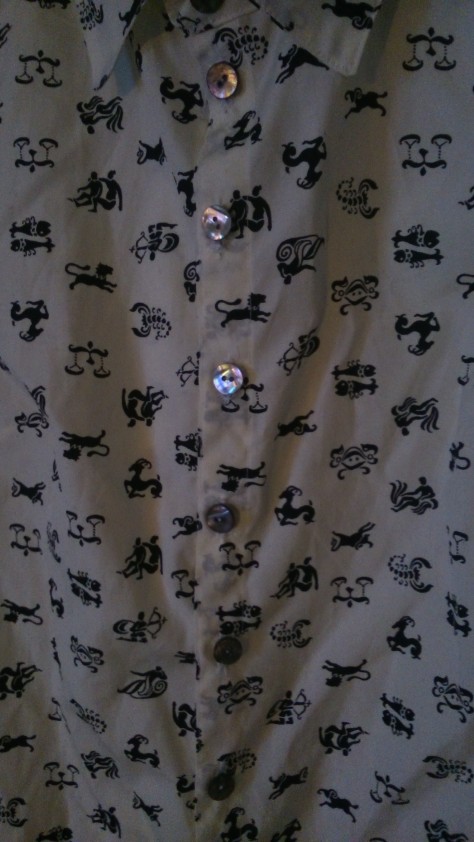
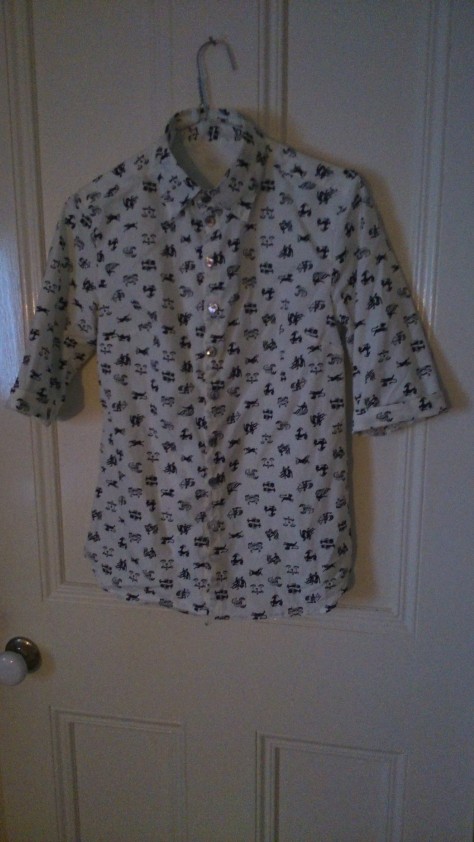
The next experiment was conducted in leftovers from the zodiac dress (which btw I never wear).  I added a 4cm box pleat to the back for added squareness, shaved a bit of the pointiness off the collar, and put the buttons closer together.  I didn’t have enough fabric for full sleeves, so I did half sleeves, rejoicing at how it also meant that I didn’t have to wrangle cuff slits again.

DSC_1092

The angle of the collar is slightly wider and less ’70s.

DSC_1090

Shell buttons are what I had.  Forgive the wrinkles, I wore it yesterday.

DSC_1089

Trust me the sleeves look slim-cut on.

I couldn’t be bothered putting it on to take a photo, it’s freezing here.

Emboldened, I have embarked upon the foolish venture of cosplay once again.  Not 18th Century this time though.  because when do I ever do the same thing twice? I had to go to the completely opposite end of the spectrum:

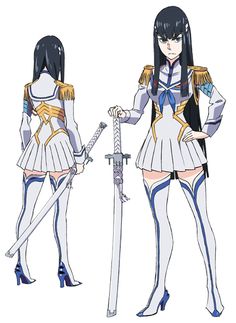
satsuki

The only character with resting bitch face better than mine and eyebrows better than Cara Delevigne, Satsuki Kiryuin from the decadently OTT anime Kill la Kill.  I really love the design of Junketsu, her uniform.  It’s got a great balance of elements and influences, and just enough patterning challenges without requiring too much engineering or working with awful stretch fabrics (which as I have mentioned before are the spawn of Bealzebub).  Because it’s got a very stiff military aesthetic, I got a mid weight cotton twill, which has got a similar hand to the fabric used in naval dress uniforms, even though it’s a little thicker.  I didn’t want to fiddle around too much with lining, so it had to be thick enough that it’s opaque.

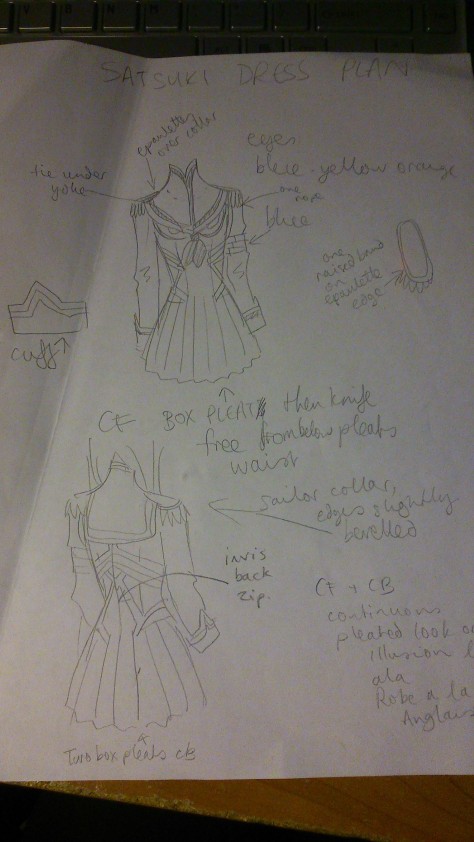
Pattern wise I started off with a plain ol’ princess bodice and worked from there.  Behold my illegible plan:

DSC_1096

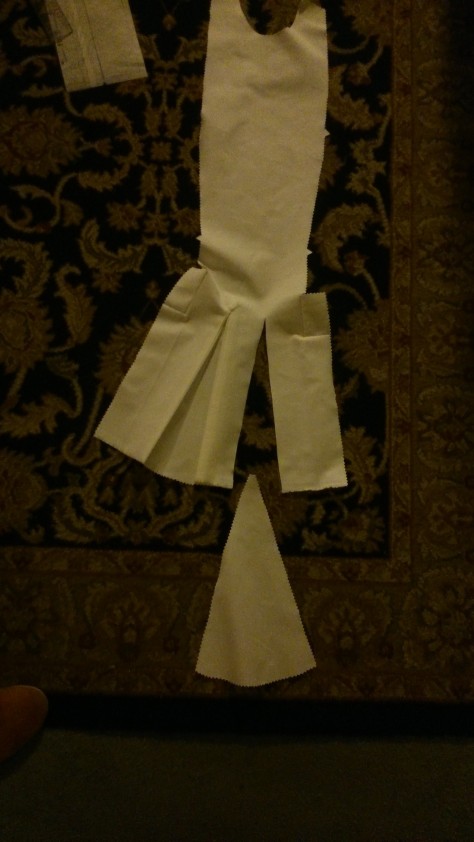
Most of the vertical seams will be hidden by the gold detailing, which is important because this fabric shows its seams no matter how crisp it’s pressed.  Bearing this in mind, I wanted to keep that really smooth effect at the front where it appears as though there isn’t a waist seam and the pleats flow directly out of the front panel.  Solution: godets.  Only, I pressed mine into pleats.

DSC_1076

I think we should call them pizza-pleats.

The little square pieces added at the sides are because I overestimated my bodice length.  Of course I didn’t test it with a toile, this is seat-of-the-pants stuff as usual.  Then I added on the side and back panels.  (The skirt side panels will be pleated and pieced in separately, so yeah they’ll have a waist seam. Shh.)    Fitting it, I’ve realised that I need to take it in a bit under the arms and cut the armscyes out more at the back because I have what Natalie Bray refers to in Dress Pattern Designing as ‘especially erect posture’, as well as square, prominent shoulders. The sleeves will be from my shirt pattern, because they work and have enough ease for the elbow-crinkle she’s got going on, and the collar will be a separate piece and I’ll snap it on or something.  This is the stage it’s at now:

DSC_1083

Excuse the pyjamas.

Should have mentioned as well, an extra bra with some socks in it is lending me some aid.  Satsuki-sama (like the rest of woman-kind, let’s face it) is a couple of sizes up from me.

DSC_1084

I think I keep up in the resting bitch face department though.

Dang, you can see the wrinkles that my posture causes though.  Should have twigged ages ago when the pattern book said its recommended armscye shaping was for the ‘slightly rounded posture of today’ (by which they mean, like, the ’60s).  My back’s more like a board.

Next step, skirt side-panel wrangling, sleeves, collars and cuffs.  And then I can get to do the detailing, order an enormous wig and a fake katana, and work out how the hell I’m going to do those boots.  Other cosplayers before me have used stretch PVC over a boot or shoe, and held the resulting boot-stocking/leg-glove up with Hollywood tape.  The thought of my cantankerous Janome encountering stretch PVC makes me shudder.  It’s bound to be exciting.

Ok, I Admit It, I’m Dead

Struggling, at any rate. I can’t actually remember when I last posted.  I’d need to look at it and check and I don’t think I actually want to know.  Wait, yes I do.

LAST YEAR. OH DEAR GOD.

dontwanttogoonthecartBUT I DON’T WANT TO GO ON THE CART!

You know what I’m blaming?  Opera.  So far this year I’ve made two role debuts (Mabel in Pirates of Penzance and Woodsprite 1 in Rusalka), and studied Czech diction because we did the Dvořák in Czech.  And for that one I also helped out with costume alterations.  Between that and working full time I have been one busy little sausage.  At one point I worked out that I was putting in 50+ hour weeks.  And my costume for the G&S was effectively a large lemon meringue pie (as is customary).

DSC_0941

This is how I looked.

DSC_0943

This is how I felt about it.

Understandably sewing’s taken a backseat while I’ve been putting in production calls and learning what sound a ‘ř’ makes.  I had one mad rush when we did a Czech art song concert and the director told us she wanted brightly coloured cocktail dresses as a dress code.  (FYI my concert wardrobe is the picture in the dictionary beside ‘funeralcore’)  I had a grand total of 10 hours to either a) find something in the shops that fit the bill, fit me and didn’t break the bank (I actually had a breakdown in Emporium and had to go home.  I was very stressed out at that point) or b) make something with the 4m of fuchsia silk a friend had made me buy on the offchance.  Turns out that friend is pre-sentient.  I went for hurriedly making something, whilst having an actual panic attack, and because I am completely incapable of doing anything the easy way, I went with the muslin that had been sitting on my dressform for the last 6 months that I’d pinned on there in a daze of admiration for tight pleats.  You can see where this is going, can’t you.

I didn’t bother to hem it, and had only just finished the zip when my friends swung by to pick me up.  This is what I ended up with:

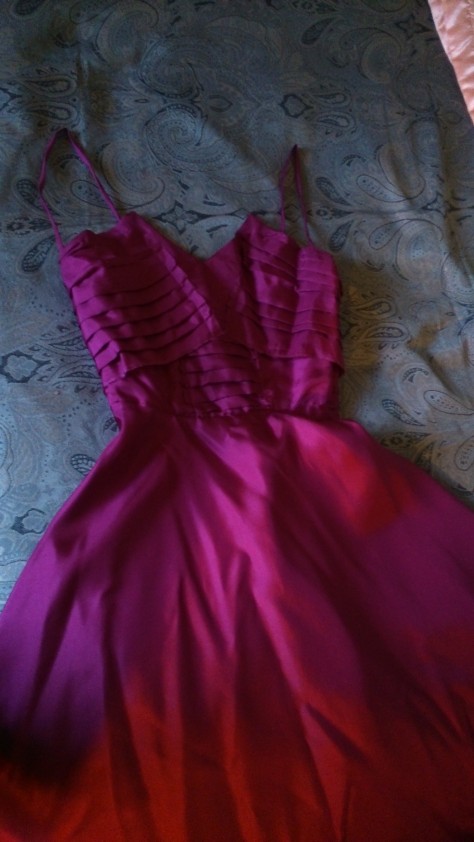
fuchsia dress

WHY THE HELL DID I EVEN?  WHEN ARE PLEATS SENSIBLE FOR THE TIME-POOR?

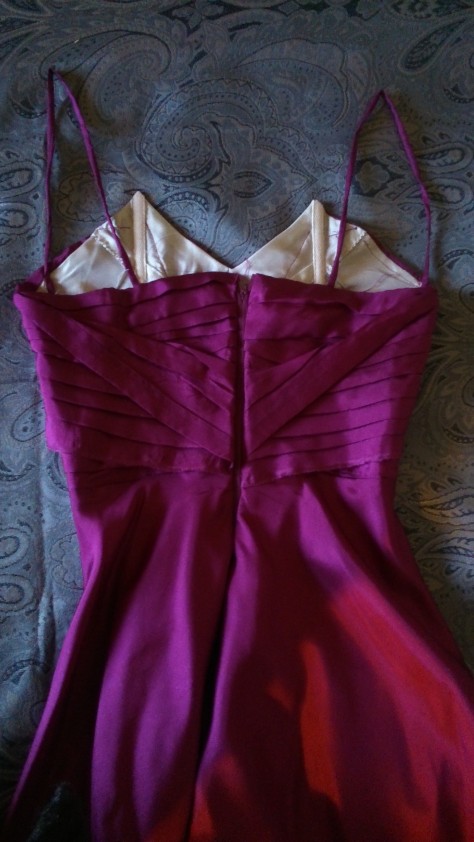
fuchsia dress back

Again, why?  And that’s not even the half of it, because look at the inside:

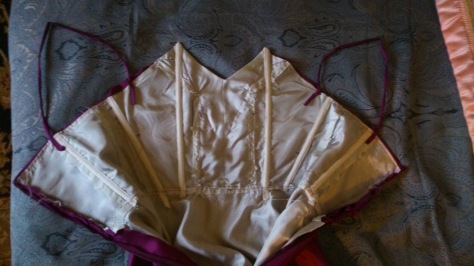
fuchsia dress innards

Yes, that bodice is fully boned.  I still have no idea how I did this in 5 hours whilst hyperventilating.

Looking at it now I am completely amazed at what an idiot I am, and simultaneously thinking that my skills must be improving if I can turn out something like that under massive pressure.

Fortunately the other two/three things don’t have such dramatic backstories.

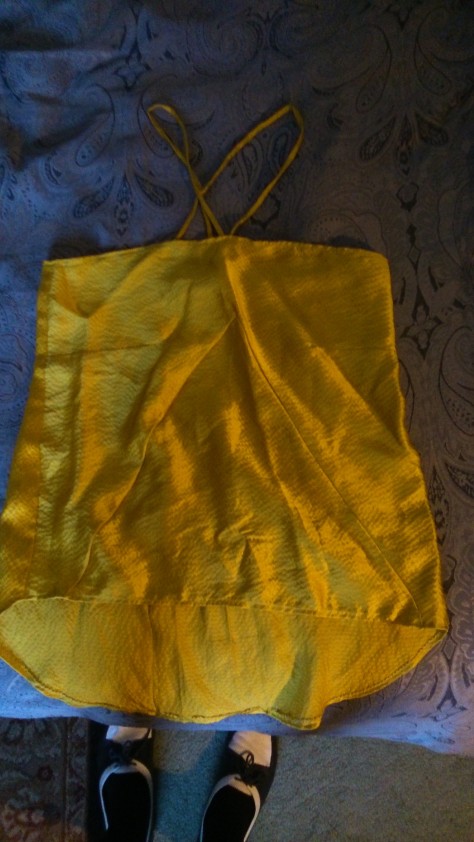
Thing the first: I finally used that chartreuse silk satin seersucker for something.  A boxy cami with a creative strap arrangement and a by-the-seat-of-one’s-pants triangular panel detail.

chartreuse cami

By the seat of the pants as in, I only looked up a tutorial on setting in triangular panels AFTER I’d sewn it.

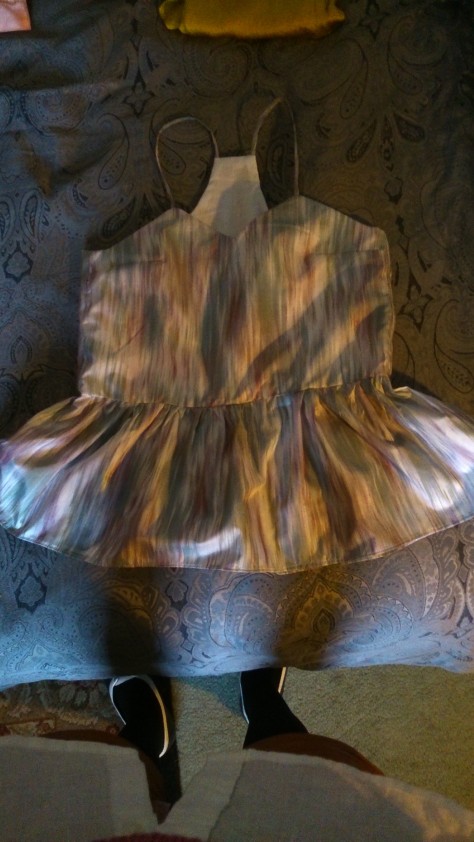
Thing the second: a ruffle-bottom racer-back cami in silk ikat with cotton lining, based on a Tibi one that I saw online that would have cost me $400 if I hadn’t had a metre of this still sitting in my stash from 2013.  I made it yesterday, and because I was calm and everything stressful is finished, it’s all neat and pressed properly and symmetrical and stuff.  This is the standard to which I could hold myself if I wasn’t so bloody minded under pressure.

ikat cami

I still haven’t figured out why I’m making all this summer stuff.  It’s like 10 degrees in Melbourne right now.

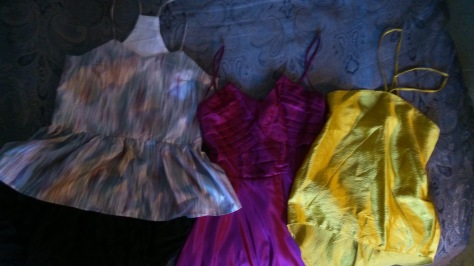
And here they are all together with a skirt that I altered from a dress a few months back in order to be less 1980s French maid and more 1990s sailor scout.  It hasn’t been ironed.  I give no craps because you can’t see it properly in this photo anyway.

all three

And you’d think the ’90s were back judging by the number of spaghetti straps in this photo.

Next up, as many button-down shirts as I can possibly make.  They are my uniform, so I may as well make a ton while I have the time.